- Use the current Proxmox VE 9.x ISO and verify its SHA256 checksum against the download page.
- Use wired Ethernet for the management interface – Wi-Fi adapters are not suitable for the standard Proxmox Linux bridge design.
- Proxmox VE 8.1 and later support Secure Boot – leave it enabled unless you have a specific compatibility issue.
- For ZFS, expose physical disks directly: AHCI mode for onboard SATA, or HBA/JBOD/IT mode for dedicated storage controllers.
- Decide on a stable FQDN and management IP before the installer – both are difficult to change on clustered nodes after creation.
- LVM-thin for a simple single-disk host; ZFS mirror when two matched drives and storage redundancy are the priority.
- Verify the target disk twice: the installer erases all selected drives with no recovery option.
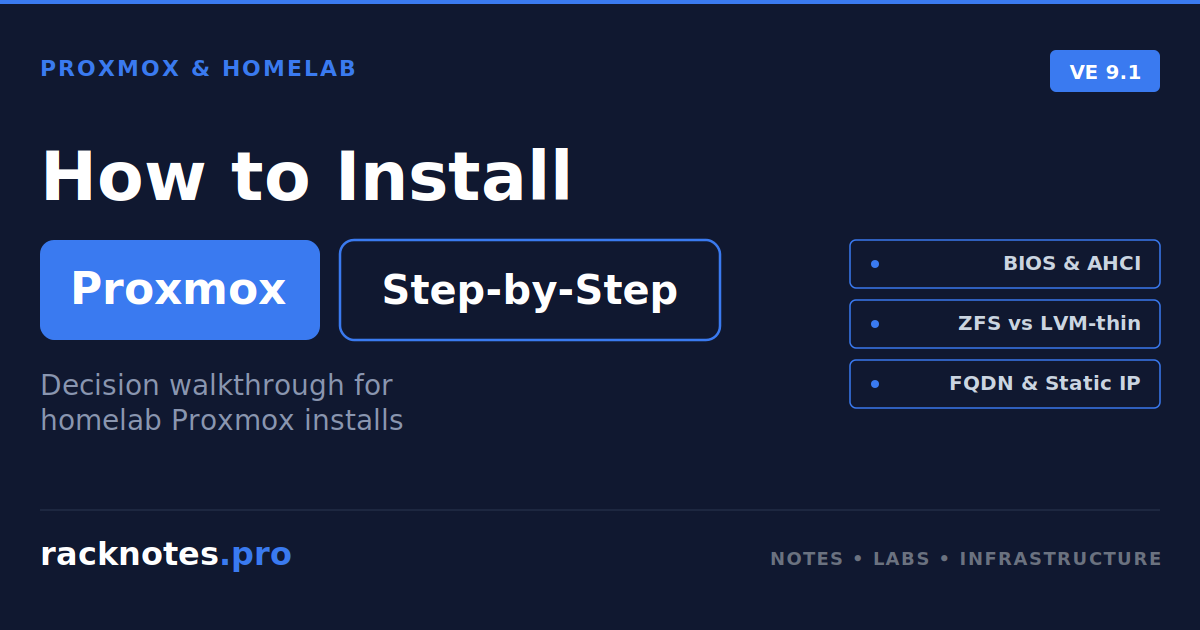
Most Proxmox VE installs follow a similar path: ISO to USB, boot, walk through the installer, configure networking, log in. Learning how to install Proxmox itself takes 30-45 minutes if hardware is ready.
Many first-time installation failures happen before the installer even starts: incorrect firmware settings, bad USB media, cabling, or selecting the wrong disk. The Proxmox VE installer is well-tested. This guide on how to install Proxmox covers each decision point with operational context and the failure modes that surface repeatedly in Proxmox forum installation threads.
This guide covers how to install Proxmox VE 9.x on bare metal, validated against the PVE 9.2-1 ISO. After completing the installation you will have:
- A working Proxmox VE host on bare-metal hardware
- Web UI accessible at
https://your-ip:8006 - Functional storage backend (LVM-thin or ZFS, depending on hardware)
- Networking configured and ready for VM deployment
Who this guide is for
This covers how to install Proxmox through the official ISO installer for homelab and small-business deployments. The intended reader is either setting up Proxmox for the first time, or has not touched a Proxmox installer since 8.x.
Out of scope: enterprise multi-node clusters with FC SAN storage, automated PXE deployment, complex partitioning schemes, or installation on top of an existing Debian system (covered briefly near the end). For hardware selection, see the mini PC for Proxmox guide. For platform comparison, see Proxmox vs ESXi Free 2026.
Most common first-time mistakes
These recurring failure patterns appear consistently in Proxmox forum installation threads. All are preventable with a few minutes of planning before the ISO boots.
Installing on a Wi-Fi-only system. Wi-Fi adapters are not suitable for the standard Proxmox Linux bridge design that connects VMs to the LAN. Wired Ethernet is the right approach. If the machine has only Wi-Fi, add a USB or PCIe Ethernet adapter before installing.
Using a motherboard RAID controller with ZFS. ZFS needs to see physical disks directly. A controller in RAID mode presents virtual disks to the OS, hiding the physical devices. For onboard SATA, use AHCI mode. For dedicated storage controllers, use HBA, JBOD, or IT mode. This is a BIOS change made before the installer runs.
Hostname mistakes. Two patterns. Using .local as a domain suffix conflicts with mDNS and causes resolution failures later. Using only a short hostname like pve instead of a proper FQDN like pve.home.arpa causes problems in cluster and certificate contexts. Use a proper FQDN even for a single-node setup.
Skipping a stable management IP. Use an address outside the dynamic DHCP pool, or create a DHCP reservation. The management address needs to be predictable – for cluster nodes, it must be defined before cluster creation and cannot be changed without a full cluster procedure.
Undersized boot device. Very small boot devices leave little room for logs, updates, ISO images, templates, and local storage. 64 GB is a comfortable practical floor if the same disk will also hold local content.
Hardware requirements
CPU. Any 64-bit Intel or AMD processor. Most modern x86-64 processors support hardware virtualization, but confirm support and firmware settings for the exact platform. Enable Intel VT-x or AMD-V in BIOS before installing. Enable VT-d or AMD-Vi only if PCI passthrough is planned – it is not required for a basic Proxmox installation.
RAM. Proxmox lists 1 GB as the evaluation minimum, not a practical production target. The recommended baseline is at least 2 GB for host services plus memory for guests. ZFS needs additional memory – roughly 4 GB base plus about 1 GB per TB of raw disk capacity is the planning estimate from the official installation documentation, though the actual requirement depends on workload and the configured ARC limit. Full RAM planning details are in the Proxmox RAM sizing guide.
Storage. The installer wipes whichever disk you select – no option to preserve existing data. Verify disk selection twice before clicking through. For ZFS configurations, the installer needs direct access to physical disks through the storage controller.
Network. Use wired Ethernet. Single 1GbE covers basic VM workloads. 2.5GbE or 10GbE matters for VM migration or NFS-mounted storage.
Download and verify the Proxmox VE ISO
Step one of how to install Proxmox is getting the right ISO. The current version is Proxmox VE 9.2, based on Debian 13 Trixie with kernel 7.0. PVE 8.4 remains supported through August 2026 – new standalone installations should use the current PVE 9.x ISO unless compatibility with an existing 8.x cluster requires otherwise.
Download from the Proxmox VE downloads page. The current file is proxmox-ve_9.2-1.iso at approximately 1.71 GB.
Verify the SHA256 checksum after downloading. Replace the filename in each command with the exact ISO filename you downloaded, and compare the result against the hash shown on the official Proxmox download page.
Linux:
sha256sum proxmox-ve_9.2-1.isomacOS:
shasum -a 256 proxmox-ve_9.2-1.isoWindows:
certutil -hashfile proxmox-ve_9.2-1.iso SHA256If the output does not match the published hash, re-download. Corrupted ISOs cause installer failures that look like hardware problems.
Create the installation USB
Use a USB drive larger than the ISO image. An 8 GB stick is a convenient practical choice.
Linux:
lsblk
dd bs=1M conv=fdatasync if=proxmox-ve_9.2-1.iso of=/dev/sdX
Run lsblk first to confirm which device is the USB stick. Writing to the wrong device destroys that disk’s contents.
Windows with Rufus: Open Rufus, select the ISO, select the USB device. When Rufus asks whether to download a different version of GRUB, choose No. When prompted about write mode, choose DD Image mode. ISO mode fails to boot the Proxmox installer on many systems.
macOS with Etcher: Select ISO, select USB device, write. Etcher handles the rest without additional configuration.
BIOS and UEFI settings
Five settings to verify before the installer runs.
- Intel VT-x or AMD-V – enable for KVM virtualization. Usually found under CPU Configuration, Advanced, or Security in BIOS.
- VT-d or AMD-Vi – enable only if PCI passthrough is planned. Not required for a basic Proxmox installation.
- Secure Boot – Proxmox VE 8.1 and later support Secure Boot. Leave it enabled for a standard installation. Disable only if the installer encounters a specific firmware compatibility issue, you need to run the memtest86+ option from the installer menu, or you are loading unsigned third-party kernel modules. If a DKMS module is required later, follow its signing and MOK enrollment instructions rather than disabling Secure Boot.
- Disk controller mode – for onboard SATA, use AHCI mode if ZFS will manage those disks. For SAS or hardware RAID controllers, use HBA, JBOD, or IT mode. Do not place ZFS on top of a hardware RAID virtual disk.
- Boot order – set USB first, temporarily, so the installer boots from the USB device.
Save and reboot with the USB plugged in. The Proxmox VE installer menu should appear after the system boots from the USB device. On systems with storage controllers or extensive memory initialization, this can take longer than on consumer hardware.
How to install Proxmox: the installer walkthrough
Select Install Proxmox VE (Graphical) from the welcome menu. Use Terminal UI if the graphical installer has display or driver problems. Use Terminal UI, Serial Console for a machine managed through a serial console without a display.
Accept the EULA. Nothing to decide here.
Target disk and filesystem selection. This is the most important decision in the installation. The installer asks which disk to install on, and clicking Options exposes the filesystem choice. The default is ext4 with LVM, which works for most simple cases.
| Hardware / goal | Starting point | Important trade-off |
|---|---|---|
| Single SSD, first homelab node | ext4 + LVM-thin | No disk redundancy; LVM-thin also supports snapshots |
| Two similar SSD or NVMe drives | ZFS mirror | About 50% of raw capacity usable |
| Four drives, VM random I/O priority | Two mirrored ZFS vdevs | About 50% usable capacity; two-disk survival depends on which disks fail |
| Four drives, tolerate any two disk failures | RAIDZ2 | About 50% usable capacity; lower random I/O than mirrored vdevs |
| Six or more drives, double parity | RAIDZ2 | Better capacity efficiency at wider vdev widths; plan topology before installing |
| 8 GB total RAM | LVM-thin is simpler | ZFS can work with a constrained ARC, but guest RAM becomes tight |
| Hardware RAID controller with battery-backed cache | ext4 or XFS + LVM on the RAID volume | Do not layer ZFS on top of a hardware RAID virtual disk |
| Existing data on target disk | Stop | Installer erases all selected drives – backup first |
Storage architecture decisions beyond the installer defaults – pool layouts, VDEVs, compression, ARC tuning – are covered in the Proxmox storage guide.
Location, timezone, keyboard. Country and timezone affect package mirror selection and log timestamps. Keyboard layout matters during emergency console access.
Root password and email. Set a strong root password – this is the credential for both SSH and web UI. The email field is used as a notification recipient, but delivery requires separate configuration and testing after installation. Enter a real administrative address.
Network configuration.
- Management interface: Select the wired NIC. If multiple NICs are present, pick the one connected to the management network.
- Hostname (FQDN): Use a proper FQDN like
pve1.home.arpaornode1.lab.internal. Avoid.local– it conflicts with mDNS and causes resolution failures. For cluster nodes, the hostname becomes the node identity and cannot be changed after cluster creation without following the official node renaming procedure. - IP address: Configure a stable management address outside the DHCP pool. Use CIDR notation, for example
192.168.1.50/24. - Gateway: Your router’s IP address, typically the first host address on the management subnet.
- DNS server: Prefer a resolver that knows the internal namespace. The installer creates a local
/etc/hostsentry so the node can resolve its own FQDN, but other clients and future cluster nodes still need internal DNS or consistent host-file entries. Public resolvers do not resolve private names likepve1.home.arpa.
Review the summary screen. Before clicking Install:
- Verify target disk – all data on selected disks will be destroyed
- Confirm static IP and gateway – wrong values mean the web UI is unreachable after reboot
- Confirm hostname and FQDN format –
.localand bare hostnames cause downstream problems that take longer to fix than a reinstall
Click Install. Disk formatting and package installation usually take several minutes, depending on the installation media, target storage, and system firmware. Reboot when prompted.
Should you install Proxmox on top of Debian?
A second installation path is to install Debian 13 first and then add the Proxmox VE packages on top. This is officially supported and documented in the Proxmox wiki.
For most homelab cases, the ISO installer is the recommended default. It handles partitioning, network configuration, and package selection in one step. Debian-on-top is appropriate when repurposing an existing Debian server, or when custom partitioning schemes are needed that the ISO does not expose. The troubleshooting surface is larger – you are debugging Debian state plus Proxmox packages rather than a single tested installer path.
First login
After reboot, open https://<management-ip>:8006 in a browser.
The browser warns about a self-signed certificate. Proxmox generates one during setup. Verify that you are connecting to the management IP you configured before accepting the browser warning. Replacing the certificate with a trusted one is a post-install task.
At the login screen, select Linux PAM as the realm and log in as root using the password set during installation. The Datacenter view loads.
An unlicensed node displays a subscription reminder. The reminder is informational and does not affect functionality or repository access. Subscription status and repository configuration are separate settings – switching repositories does not remove the reminder. Do not patch package-managed web UI files to hide the popup. Repository setup and other post-install configuration are in the post-install checklist.
Sanity checks after installing Proxmox
SSH to the host or use the Shell button in the web UI.
hostname
hostname -f
getent hosts "$(hostname -f)"
ip -br addr
ip route
pveversion -v
uname -r
lsblk -o NAME,SIZE,MODEL,SERIAL,TYPE,FSTYPE,MOUNTPOINTS
pvesm status
hostname -f should return the full FQDN you configured, not a short hostname. Confirm that the FQDN resolves to the management IP, not only to 127.0.0.1 or 127.0.1.1. ip -br addr confirms vmbr0 has the management address. pveversion -v confirms the PVE release family – a newer point release after the first update is expected and is not an installation failure. pvesm status confirms configured storage is active.
Common problems when installing Proxmox
USB doesn’t boot. Verify BIOS boot order has USB first. If the USB was created in Rufus with ISO mode instead of DD mode, recreate it with DD mode. Also verify the USB port is enabled in firmware settings.
“No bootable device” after install completes. Verify the internal target disk is visible in firmware and selected as the first boot device. Check whether the installer was booted in UEFI or legacy mode – the bootloader is written to match. Use the Rescue Boot option from the Proxmox installer USB if the bootloader needs repair.
Wrong NIC selected during install. If the web UI is unreachable, log in through the physical console, serial console, or IPMI/iKVM. Run ip -br addr and ip route, identify the correct interface, and update /etc/network/interfaces. Apply changes from a local or out-of-band console – making network changes remotely can terminate the active session.
Hostname .local causing resolution failures. Symptom: web UI loads slowly, SSH hangs at hostname lookup, mDNS conflicts. Do not treat a Proxmox node rename as a standard two-file Linux hostname change. If the node is still empty, reinstalling with the correct FQDN is the safest option. If it must be renamed, follow the official “Renaming a PVE node” procedure exactly.
ZFS installation fails with disk errors. Check the exact installer error before changing firmware settings. Common causes include an onboard SATA controller in RAID mode, a dedicated controller not operating in HBA/JBOD/IT mode, stale storage metadata from a previous installation, mismatched disk sizes, or failing media. For onboard SATA, switch to AHCI. For dedicated controllers, expose the physical disks directly. See the Proxmox ZFS documentation for supported controller configurations.
What to do next
The install is the foundation. The next steps that make the host operational:
- Post-install configuration – repository setup, updates, MFA, notifications, firewall basics, storage health, and a tested backup restore: post-install checklist
- Update strategy – when to update, how to stage, kernel rollback: Proxmox update guide
- RAM sizing – how much RAM your workload actually needs: RAM sizing guide
- Storage architecture – ZFS vs LVM-thin vs Ceph, pool layouts, real trade-offs: storage architecture guide
For hardware context, see the mini PC for Proxmox guide. For platform comparison, see Proxmox vs ESXi Free 2026 and What is Proxmox VE.
This guide covers how to install Proxmox VE 9.x on x86-64 bare metal hardware for homelab and small-business deployments. Validated against the PVE 9.2-1 ISO (Debian 13 Trixie, kernel 7.0, released May 2026). Not covered: PXE or automated deployment, installation on existing Debian, ARM deployments, enterprise SAN configurations.
Proxmox VE Series
22 articles — Installation · Storage · Networking · HA · Recovery