
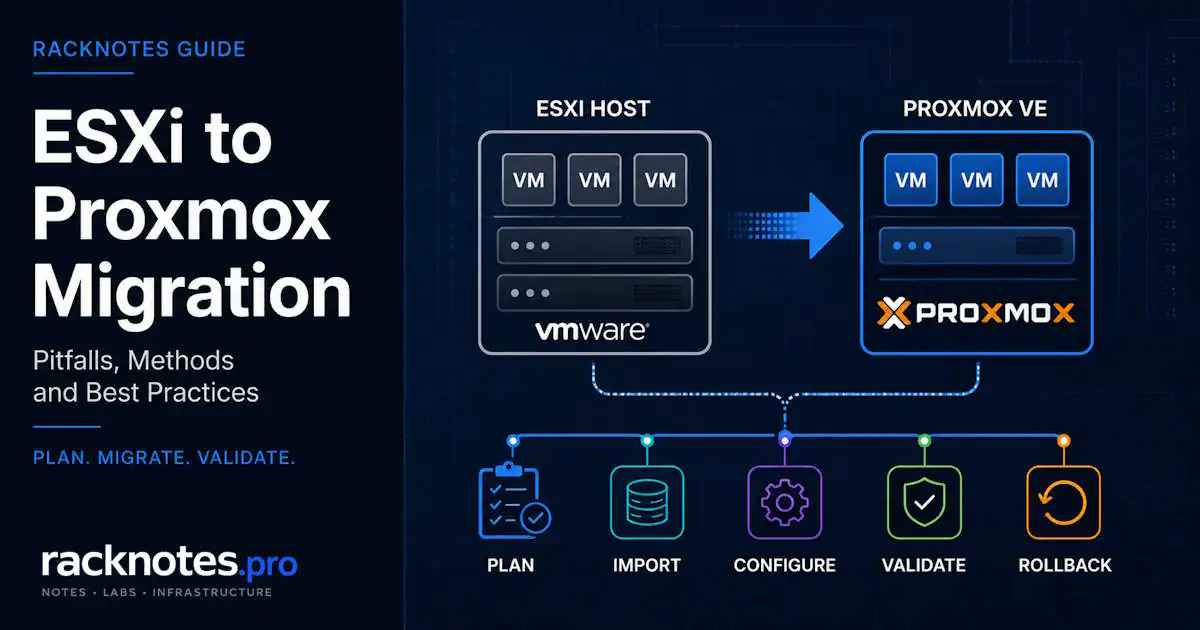
An ESXi to Proxmox migration in 2026 is usually easiest through the built-in Proxmox Import Wizard, which has been tested with ESXi 6.5 through 8.0. Copying the VM is only one part of the project. Firmware mode, Windows storage drivers, VLAN mapping, backup compatibility, and rollback determine whether the cutover succeeds.
You cannot convert an ESXi host to Proxmox in place. Proxmox replaces the host operating system, so you need a separate target host, temporary capacity, a backup-based restore path, or a phased plan that evacuates and rebuilds one server at a time.
This guide covers the direct import workflow, the live-import option, fallback methods, Windows VirtIO preparation, BIOS/UEFI handling, storage and networking decisions, and the validation steps to complete before deleting the source VM.
For most supported ESXi 6.5-8.0 VMs, an ESXi to Proxmox migration starts with the built-in Proxmox ESXi Import Wizard. Use live import where appropriate to reduce downtime, but still shut down the source VM before the target enters production.
Prepare Windows guests for VirtIO, match BIOS or UEFI, map every VLAN and disk, keep the ESXi source powered off but intact, and do not retire it until the Proxmox VM passes reboot, application, backup, and restore validation.
Direct import from VMware vSAN storage is not supported, so vSAN-backed VMs need a different staging, export, storage-migration, or backup-restore path.
Can you convert an ESXi host to Proxmox in place?
No. This is the first thing worth settling, because it determines the entire shape of an ESXi to Proxmox migration.
Proxmox replaces the host operating system. Installing it over an ESXi host destroys the VMFS datastore and everything on it. No upgrade path, no conversion utility, no way to preserve VMs on local disks through the install. That leaves five realistic options:
- A separate Proxmox host. The cleanest path, and the one this guide assumes by default.
- A temporary migration host. Borrowed or rented hardware that holds workloads while the original box is rebuilt.
- Wave migration. Evacuate one ESXi node, reinstall it on Proxmox, move workloads back, repeat. Needs spare cluster capacity.
- Backup-based restore. Restore from an existing backup product into a rebuilt host, trading transfer time for a simpler cutover.
- Application-level rebuild. Fresh VMs plus data migration. Most engineering time, cleanest result.
Keep at least one verified copy of every source VM until the migrated workload has passed application, backup, and reboot validation. Whichever path you pick, the source VM being powered off but intact is what makes rollback possible. Deleting it early is the single decision that turns a recoverable problem into an outage.
ESXi to Proxmox migration methods compared
Since Proxmox VE 8.2, the built-in import wizard connecting directly to an ESXi host is the primary path for most ESXi to Proxmox migration work. The methods that used to be the default (OVA export, manual VMDK conversion) are now fallback options for cases the wizard does not cover.
| Method | Best for | Downtime profile | Main limitations |
|---|---|---|---|
| ESXi Import Wizard | Most VMs on tested ESXi 6.5-8.0 hosts | Cold import, or reduced downtime with live import | No direct vSAN import; guest drivers, firmware, and network still require validation |
| OVF/OVA import | Disconnected environments and portable appliance exports | Usually a full export/import window | Extra transfer and conversion time; config mapping may need manual work |
| Manual VMDK import | Custom workflows and direct control over disks | Depends on staging and copy method | Manual VM creation, disk attachment, and validation |
| Veeam restore to Proxmox | Existing supported Veeam backup estates | Depends on backup and restore workflow | Verify exact PVE version and feature limits; support may lag the newest Proxmox release |
| Fresh VM plus data migration | Legacy OS, critical apps, or planned rebuilds | Application-specific | Highest engineering effort, cleanest long-term result |
Use live import when the VM and storage path support it. The source VM is shut down for cutover, but the Proxmox VM can start before every disk block has finished copying. Required blocks are fetched on demand while the remaining data transfers in the background. This can reduce service downtime substantially, but it does not remove the need for application shutdown, source/target isolation, rollback planning, and post-boot validation.
Live import is not VMware-style cross-hypervisor live migration: the source guest still needs a controlled stop first.
On the fallback paths: OVA export works fine for simple Linux VMs with single disks and gets awkward past that. Manual VMDK handling gives full control over disk format and controller type, but the target format depends on the destination storage. LVM-thin, ZFS, and Ceph present block storage and normally use raw volumes, while directory or NFS storage can use qcow2. Converting to qcow2 first is an extra step you do not need when the target is block storage:
qemu-img convert -O qcow2 source.vmdk destination.qcow2Prefer qm importdisk or the current import workflow to bring the disk in directly where possible, rather than always converting through qcow2 as an intermediate format.
When you should not migrate
Several scenarios where an ESXi to Proxmox migration is the wrong call and staying on VMware makes more sense:
Regulated environments with vendor-validation requirements. vSphere has the audit trail and certification ecosystem. Retrofitting Proxmox usually costs more than the licensing it saves.
Heavy NSX, vSAN, or Aria investment. You are not migrating one product, you are rebuilding ten.
Hard DRS dependency. Proxmox VE 9.2 introduced a Dynamic Load Balancer that migrates HA-managed guests automatically based on real-time resource use, so it is no longer accurate to say Proxmox only does reactive failover. It is also not DRS in maturity, scope, or scheduling model. Check whether the HA-managed scope covers your use case before assuming parity.
vGPU requirements. Full-GPU passthrough via VFIO works fine in most cases. Slicing one GPU across multiple VMs is significantly less polished than VMware’s NVIDIA integration. Validate it on your hardware before committing; the Proxmox GPU passthrough guide covers what that path requires.
Windows-only teams without Linux ops experience. Proxmox vs Hyper-V is often the more useful comparison than retraining the team on Linux fundamentals.
Many homelab and SMB environments can justify the move, especially when they use conventional VMs, standard VLANs, supported storage, and a backup workflow that has been validated on Proxmox. The decision is less obvious when the environment depends on VMware-specific networking, storage, backup, certification, or operational tooling. For the platform-level decision rather than the migration mechanics, see Proxmox vs ESXi in 2026.
Pre-migration checklist
Most failed ESXi to Proxmox migration attempts skip two or three items below and discover them mid-cutover.
Source environment audit:
- Record BIOS vs UEFI mode for every VM, plus Secure Boot and TPM state for anything that uses them
- Verify MBR/GPT partitioning before changing firmware
- Document VLAN tags and port-group mappings from ESXi, including MTU and any LACP/bonding in use
- Note disk controller types currently in use (PVSCSI, LSI Logic SAS, SATA)
- Record MAC addresses, static DHCP reservations, and anything licensed or tied to MAC, UUID, CPU ID, TPM, or hostname; decide per identifier whether it must be preserved or can be regenerated
- Export or confirm access to BitLocker recovery keys before changing firmware, TPM, or Secure Boot
Target environment preparation:
- Update the target node and confirm the importer package is present before the ESXi to Proxmox migration window; the install the target Proxmox host guide covers the base build
- Download the VirtIO drivers ISO (
virtio-win.isofrom Fedora’s official repo) for Windows guests - Confirm free space for VM disks plus snapshots plus temporary import files; size for provisioned or actual-used data, whichever is larger
- Validate cluster network latency before enabling Proxmox HA or Ceph (Corosync wants under 5ms)
- Decide CPU type per VM (cluster-compatible baseline versus
host); defaulting tohosteverywhere can block live migration between nodes with different CPUs
Safety nets:
- Verify backup restore actually works on a non-critical VM, not just that backups complete
- Keep source VMs powered off but intact during cutover, and never power the source and the migrated VM on at the same time on the same production network
- Test migration end to end on one non-production VM before scheduling production cutovers
- Size the maintenance window from a measured pilot migration, not a fixed guess
- Shut down applications cleanly through the guest OS before final cutover: stop services, flush databases, confirm filesystem consistency, take a final backup
Skipping the pilot is the most common cause of multi-hour outages. The forum threads where 28 of 30 VMs migrated cleanly and 2 needed a manual rebuild are usually missing this step.
Step-by-step: import an ESXi VM into Proxmox
The primary ESXi to Proxmox migration path connects Proxmox VE to a running ESXi host directly and imports VMs through the web UI, without exporting anything first. The official Proxmox migration wiki documents the supported source versions and current workflow in detail.
- Update the target Proxmox node. Confirm current PVE packages and the importer are installed before the migration window.
- Add ESXi as an import source. In the Proxmox UI, open
Datacenter → Storage → Add → ESXi. - Enter the ESXi host and credentials. Verify the certificate fingerprint rather than blindly accepting a mismatch.
- Open the ESXi import storage. Select the source VM that Proxmox discovers.
- Map the target configuration. Choose node, storage, bridge, VLAN, CPU type, firmware, machine type, disk controller, and network model.
- Decide whether to prepare for VirtIO. For Windows, use a boot-safe controller path or preinstall the VirtIO drivers before switching the boot disk.
- Shut down applications cleanly. Stop databases and services, flush writes, then shut down the source guest.
- Start the import. Use live import where supported and appropriate; otherwise complete the cold import before booting.
- Boot in an isolated or maintenance network first. Prevents duplicate IP, hostname, domain, and database identity conflicts.
- Run the post-migration validation checklist. Do not delete the ESXi source until reboot and restore tests pass.
Both copies started on the same production network. A pattern that surfaces repeatedly during migration windows: the source VM gets powered back on “just to check something” while the Proxmox copy is already live. The migrated VM retains the same OS identity, hostname, IP configuration, application IDs, and possibly MAC-bound licensing. Simultaneous startup causes duplicate IPs, domain conflicts, split-brain services, or database corruption. Isolate the first boot and treat the source as a cold artifact until acceptance is complete.
Tested source range is ESXi 6.5 through 8.0 as of current Proxmox documentation. VMs on vSAN storage cannot be imported directly. Transfer time depends heavily on disk size and the network path between hosts, which is why the pilot measurement matters more than a per-VM rule of thumb.
Windows VirtIO driver preparation
The most frequently reported ESXi to Proxmox migration failure across community threads is a Windows VM that will not boot after the controller switch. This trips up experienced operators regularly enough that it deserves its own section.
What you will see: INACCESSIBLE_BOOT_DEVICE on Windows 10, Server 2019, and Server 2022. BSOD 0x0000007B (inaccessible boot device, Microsoft documentation) on older versions. Sometimes 0xc0000225. Occasionally the VM boots fine but has no network, with the old VMXNET3 adapter still holding the static IP.
VMware guests often use VMware-specific PVSCSI storage or VMXNET3 network devices, while Proxmox commonly uses VirtIO SCSI and VirtIO network adapters. Windows does not include the current VirtIO driver set by default. If the boot controller is switched before the matching VirtIO storage driver is installed and active as boot-critical, Windows stops with INACCESSIBLE_BOOT_DEVICE.
- Boot the VM with emulated devices first. Set network to
e1000and disk toIDEorSATA. Windows has these drivers built in, so the VM boots. - Add a temporary VirtIO SCSI disk as a second drive on the running VM. Windows detects it and prompts for drivers.
- Mount the VirtIO ISO and install network and storage drivers.
- Shut down, remove the temporary disk, switch the boot disk controller to VirtIO SCSI, and switch the network adapter to VirtIO.
- Boot again and confirm the VM comes up cleanly before touching anything else.
Attaching a temporary disk through the target VirtIO SCSI controller forces Windows to enumerate that controller and load the matching driver while still booting from an emulated SATA device. After the driver is active, the boot disk can move to VirtIO SCSI. This is one reliable approach, not the only one: installing the full VirtIO package beforehand, or injecting the driver offline with DISM, also works.
For most modern Windows guests, VirtIO SCSI single is a practical default: modern storage features, per-disk IO threads. Match the controller to the guest, storage backend, backup tooling, and current Proxmox recommendations rather than treating one variant as universally correct.
When the staged migration still does not work
Drivers appear installed in Device Manager, but the controller switch still drops to recovery. Worth checking in roughly this investigation order:
- Firmware mode. Confirm SeaBIOS vs OVMF matches the source before blaming drivers.
- Boot order. Proxmox sometimes re-orders devices after import. Check the VM BIOS and confirm the boot disk is first.
- Controller variant. Confirm the VM is on the controller the driver was installed for.
- Driver registered for boot. Some Windows versions need explicit injection from recovery media.
For offline injection, check the actual drive letters first, because they are not always C: and E: in the recovery environment:
diskpart
list volume
exit

dism /image:<WINDOWS-OFFLINE-PATH> /add-driver /driver:<VIRTIO-DRIVER-PATH> /recurse
Use vioscsi or viostor depending on which controller you are actually configuring, and match the Windows version folder on the VirtIO ISO to the guest.
Only repair BCD when the bootloader is actually the failing layer. If Windows detects the installation but cannot load the boot disk, fix the controller driver first. Use bootrec or bcdboot only after verifying firmware mode, disk visibility, EFI partition state, and recovery-environment drive letters. Reaching for bootrec /rebuildbcd early is how operators spend an hour repairing a bootloader that was never broken.
Linux guests are usually less work. Most current distributions already include VirtIO modules and migrate without storage-driver intervention. Boot failures are more likely on older or customized systems whose initramfs lacks the module, whose /etc/fstab uses unstable device paths, or whose bootloader assumes the previous controller layout. In those cases: boot rescue media, rebuild initramfs, verify UUID-based mounts, and repair GRUB only if the bootloader itself is damaged.
BIOS, UEFI, Secure Boot, and TPM
Older ESXi VMs typically run in legacy BIOS mode. Newer ones use UEFI. If the firmware mode in Proxmox does not match the source after an ESXi to Proxmox migration, the VM will not boot.
A pattern that keeps appearing in the Proxmox forums: operators follow the official wiki, which suggests adding an EFI disk and switching to OVMF. That advice does not account for the source VM’s actual mode. If the original was legacy BIOS in ESXi, switching to OVMF produces a VM that will not boot. The fix in those threads is consistent: delete the EFI disk, switch back to SeaBIOS. The VM boots immediately.
Match the source, then work through the rest:
- Match SeaBIOS or OVMF to the source firmware mode
- Verify MBR/GPT partitioning before changing firmware
- Attach an EFI vars disk of about 4MB for OVMF guests; UEFI needs NVRAM-style persistent storage for boot variables, and the 4m type is the current recommended choice
- Record Secure Boot and virtual TPM state; vTPM state is not automatically portable
- Export or confirm access to BitLocker recovery keys before changing firmware, TPM, or Secure Boot
- Check boot order after every disk or controller change
Machine type does not have to be q35 just because the guest is UEFI. It matters when the guest, its PCI topology, Secure Boot state, or a passthrough device needs the chipset features it exposes, not as a blanket rule. Windows 11 guests may also need Secure Boot and TPM handled explicitly, beyond firmware type alone.
Network and storage mapping
Networking is rebuilt during an ESXi to Proxmox migration and does not map one-to-one from VMware. Standard Linux bridges or Open vSwitch replace vSwitch-style host networking, while Proxmox VE SDN adds higher-level zones, VNets, routing, and overlay capabilities. For one cluster, any node can manage the clustered environment through the Proxmox VE web interface. Proxmox Datacenter Manager is a separate product that adds centralized visibility across multiple independent clusters and sites. Any NSX integration does not translate at all.
The practical work is translating port groups into bridges and VLAN tags. Typos in VLAN tags or bridge names isolate VMs without producing a visible error: you get a VM that can ping itself and nothing else. Validate with bridge vlan show rather than trusting visual inspection. The map ESXi port groups to Proxmox bridges and VLANs guide covers the primitives.
Choose the target storage before migration
VMware datastores do not map one-to-one to Proxmox storage definitions. In Proxmox, you register storage backends such as LVM-thin, ZFS, Ceph RBD, NFS, iSCSI, or directory storage, then define which content types each storage can hold. Snapshot, clone, discard, shared-storage, and migration behavior depends on the selected backend.
- LVM-thin is a straightforward block backend with thin provisioning and snapshot support. It uses less host memory and needs fewer storage decisions than ZFS, but gives no ZFS-style end-to-end checksumming, self-healing, compression, or integrated software RAID. Good fit for a single host where redundancy comes from below the hypervisor.
- ZFS is a popular Proxmox choice: checksums, snapshots, and its own memory and design considerations. Use SSD or NVMe for latency-sensitive and write-intensive VM workloads. HDD pools remain acceptable for low-IO guests, bulk storage, or backup tiers, provided latency and recovery behavior have been tested.
- Ceph is shared distributed storage for correctly sized clusters. Production hyper-converged designs need at least three nodes, and a Corosync qdevice solves Proxmox cluster quorum, not Ceph monitor quorum. Proxmox recommends dedicated Ceph traffic at 10 Gbps or better. Write latency is strongly influenced by the slowest relevant OSD and network path in the replicated write.
- NFS/iSCSI covers existing shared-storage scenarios, and is often the least disruptive option when the storage array is staying put. See shared storage for Proxmox migration and HA.
Choose on failure model, backup design, snapshot requirements, hardware, and expected IO, not only on host RAM. Full breakdown in the choose Proxmox storage for migrated VMs guide.
One ZFS trap worth flagging at planning time: ARC is reclaimable cache, but its configured maximum still matters when the host also carries VM memory. Installations from PVE 8.1 onward normally write an ARC maximum near 10% of physical RAM, capped around 16GiB, when the installer configures ZFS. Upgraded systems, manually configured hosts, or a pool added later through the GUI can land on a different effective limit. Verify the value rather than assuming:
cat /sys/module/zfs/parameters/zfs_arc_max
arc_summary
If the value is not what you intended, edit /etc/modprobe.d/zfs.conf with options zfs zfs_arc_max=<bytes>. Full implications in the size RAM for Proxmox and ZFS guide.
ZFS performance problems after an ESXi to Proxmox migration usually come from a mismatch between pool design, memory allocation, sync-write behavior, storage media, and the guest workload. Check the effective ARC limit, pool topology, latency, fragmentation, trim support, and workload characteristics before attributing the problem to the hypervisor.
Backup compatibility and rollback
Backup compatibility is the part of an ESXi to Proxmox migration most often checked too late. It must be verified against the exact Proxmox release. At the time of this update, Veeam officially lists Proxmox VE 8.2 through 9.1, while NAKIVO 11.2.1 lists full support for Proxmox VE 9.2. Veeam can restore supported VMware backups into Proxmox, but its Proxmox feature set is not identical to vSphere: current limitations include no LXC backup, no Proxmox VM replication, and no backup of VM templates. Verify the current version matrix before upgrading the target cluster or designing the migration around a backup product.
On the Proxmox-native side, vzdump is built in and produces full archives of VM configuration and data. Each run is a complete archive, which is fine for small setups or as a secondary layer.
Proxmox Backup Server is the native Proxmox backup platform. It sends backups incrementally, deduplicates on the server, verifies integrity, and presents each restore point as a complete snapshot. Strong fit for Proxmox-focused environments, but not feature-for-feature equivalent to Veeam across every application, platform, replication, and recovery workflow.
Keep the backup repository outside the failure domain of the protected host or cluster. Proxmox documentation recommends a separate physical backup server as the safer design. A PBS VM can be valid in some architectures, but storing the only backups inside the same cluster and storage failure domain defeats much of the protection. Design guidance in the design Proxmox backup and restore guide.
One SMB pattern worth flagging: relying only on vzdump to local disk on the same server. That is a redundant copy, not a backup.
ESXi to Proxmox migration validation checklist
“The VM booted” is not acceptance. Work through this before the source goes away.
- Boot twice. Confirm the VM survives a normal reboot after the first successful startup.
- Check firmware and boot order. Verify SeaBIOS/OVMF, EFI disk, Secure Boot, TPM, and the active boot disk.
- Install and enable QEMU Guest Agent. Confirm clean shutdown, IP reporting, and backup guest processing.
- Validate networking. Check bridge/VLAN mapping, MTU, static IP, DNS, gateway, firewall rules, and duplicate MAC/IP conflicts.
- Validate storage. Confirm every disk is attached, expected capacity is visible, discard/TRIM works where supported, and no temporary migration disk remains.
- Validate time. Check NTP, Windows Time, domain synchronization, timezone, and clock drift.
- Validate applications. Test ports, databases, scheduled tasks, services, certificates, external integrations, and application-level health checks.
- Validate monitoring. Re-enroll or update monitoring, alerting, EDR, backup, inventory, and configuration-management agents.
- Validate backup and restore. Create a Proxmox-native backup and restore it to an isolated network before retiring the ESXi source.
- Observe performance. Compare CPU usage, memory, disk latency, queue depth, and network throughput against the source baseline.
- Keep rollback intact. Do not delete or repurpose the source VM until the acceptance window is complete.
Uninstall VMware Tools after the migrated VM is confirmed stable, not before. Removing it from the source too early strips the VMXNET3/PVSCSI support you would need if you had to roll back.
Common migration failures
Proxmox is flexible, which means an ESXi to Proxmox migration lets you misconfigure things ESXi would not have allowed. These are not bugs. They are design decisions the platform does not hold your hand through.
Underprovisioned cluster networks. Corosync wants low latency for quorum. Ceph wants throughput. The two conflict in single-NIC setups, and underprovisioning produces HA instability and storage slowdowns in the same incident. Related symptoms that get diagnosed separately, which is what stretches the recovery.
Snapshot habits carried over from ESXi. On ESXi, long chains degrade performance, which is why “delete snapshots monthly” is a known practice in VMware shops. Proxmox snapshot behavior depends heavily on the backend, and none make snapshots free. ZFS snapshots are space-efficient at creation but still retain changed blocks and affect deletion speed, fragmentation, and capacity planning as chains grow. Qcow2 backing chains degrade as they get deep. Snapshots are not backups on any backend.
Wrong storage backend for the workload. Database VMs on LVM-thin without a snapshot strategy, or snapshot-heavy workloads on ZFS without enough RAM, both produce predictable problems. Test against your actual IO pattern rather than generic advice written for a different workload.
Automation assumed to carry over. Ansible and Terraform/OpenTofu modules differ between platforms, and provider status changes over time. Expect to rewrite resource definitions and state, not just endpoints.
Final verdict
For most conventional VMs on supported ESXi 6.5-8.0 hosts, the Proxmox ESXi Import Wizard is the best ESXi to Proxmox migration starting point in 2026. Use live import when it fits the workload and storage path, but treat it as reduced-downtime cutover rather than zero-downtime cross-hypervisor migration.
The import itself is rarely the hardest part. Successful ESXi to Proxmox migration projects prepare Windows VirtIO drivers, preserve the correct firmware mode, map every VLAN and disk, verify backup compatibility, isolate the first boot, and keep the powered-off source until reboot, application, backup, and restore tests pass.
If the environment depends heavily on vSAN, NSX, VMware-specific appliances, mature DRS behavior, certified vendor stacks, or backup features not yet available on the target Proxmox release, treat the move as a platform redesign rather than a hypervisor swap. That is a different project with a different budget, and calling it early is cheaper than discovering it during the cutover.
FAQ
Can I migrate an ESXi host to Proxmox in place?
No. Installing Proxmox replaces the ESXi host operating system. You need another host, temporary storage and compute capacity, a backup-restore path, or a phased plan that evacuates one server before reinstalling it.
Can I do an ESXi to Proxmox migration without downtime?
The final cutover needs downtime. You shut down the VM on ESXi and start it on Proxmox, while the rest of your VMs keep running on the source. Live import reduces the window by starting the target before every block has copied, but it does not eliminate it. With careful sequencing, end-user-visible disruption can be limited to a brief window per service.
Can Proxmox import VMs directly from VMware vSAN?
No. The current ESXi Import Wizard does not directly import VMs whose disks are backed by vSAN storage. Move or clone the VM disks to supported storage first, use another staging method, or restore through a supported backup product.
What is the most common Windows migration error?
INACCESSIBLE_BOOT_DEVICE, or 0x0000007B on older Windows versions. The usual cause is switching the boot controller to VirtIO before the matching storage driver is installed and active as boot-critical. Staged migration fixes it: boot on emulated SATA, install VirtIO drivers, then switch controllers.
Does Veeam support Proxmox VE 9.2?
Not according to the Veeam compatibility page available at the time of this July 2026 update, which lists Proxmox VE 8.2 through 9.1. Check the current Veeam matrix before upgrading or building a migration plan around Proxmox VE 9.2. NAKIVO 11.2.1 lists full support for Proxmox VE 9.2.
How long should an ESXi to Proxmox migration take per VM?
Duration varies too much with disk size, source storage speed, network path, and import method to plan from a fixed number. Measure one representative pilot VM end to end, then calculate the rest from that actual throughput, adding time for guest validation and rollback. First migrations in a batch run longer while you debug platform-specific issues.
What is the equivalent of vCenter in Proxmox?
There is no separate vCenter-style management server for normal cluster operation. Any node manages the whole cluster through the web UI, with configuration synchronized via pmxcfs and Corosync. Proxmox Datacenter Manager adds management across multiple independent clusters if you need that scope. The architecture is genuinely different, not simply a missing feature.
This ESXi to Proxmox migration guide reflects behavior observed across homelab and SMB environments and recurring patterns from the Proxmox community forums. It does not cover certified enterprise vSphere replacements, regulated industries with strict vendor-validation requirements, or hyperscale environments, which have different constraints and often different correct answers. Outcomes depend on hardware, storage design, network topology, and operational expertise. Test on non-production VMs first.
Last updated: July 2026 – verified against Proxmox VE 9.2, ESXi 6.5-8.0 import support, and current Veeam/NAKIVO compatibility matrices.
Proxmox VE Series
28 articles – Installation · Storage · Networking · HA · Recovery