
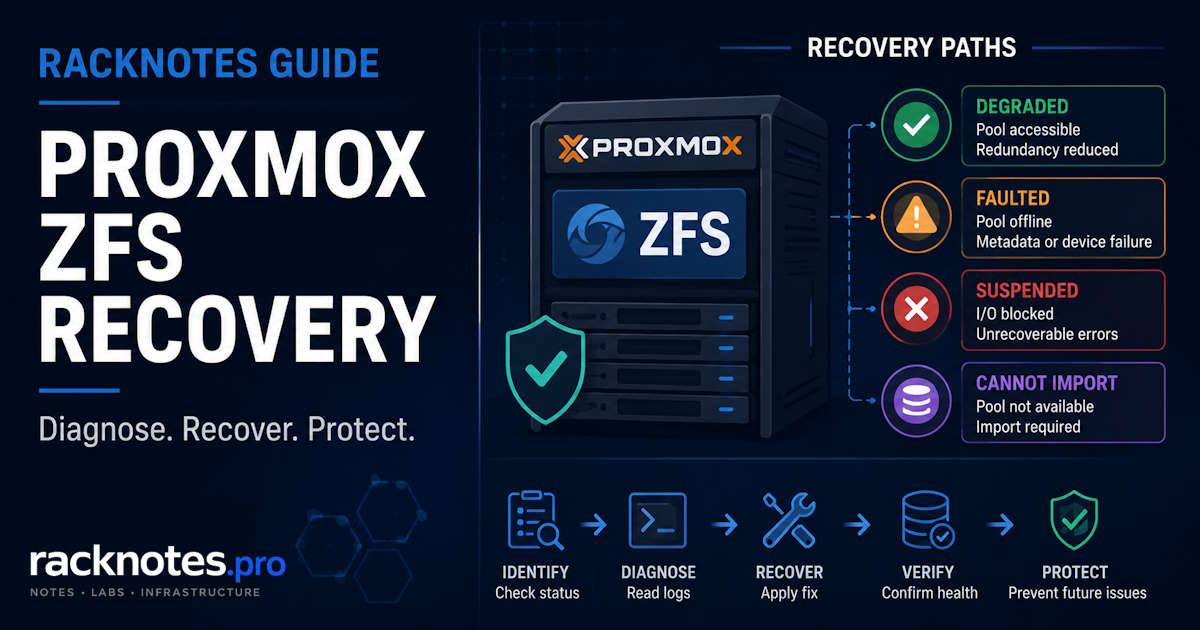
Start Proxmox ZFS recovery by determining whether the pool is imported, and capture the exact pool, vdev, device, and message-ID state before acting. For an imported pool, run zpool status -gLPv. For a pool that isn’t imported, run zpool import without a pool name.
Pool health alone isn’t enough to act on. A pool can stay ONLINE while reporting permanent data errors, and a SUSPENDED pool behaves differently depending on its failmode setting. Match the complete zpool status output and OpenZFS message ID to the specific path below, not just the top-line health string.
zpool status -gLPv, kernel logs, stable disk identifiers, and the exact OpenZFS message ID. Confirm the pool isn’t active on another host before any force import. Don’t run wipefs, zpool labelclear, zpool import -f, zpool clear -F, zpool import -F, -X, or replacement commands until the exact state, ownership, and device identity are confirmed – -f is appropriate only once ownership is confirmed stale, not a generic recovery switch.
For storage design and topology selection, see Proxmox Storage: ZFS vs LVM-thin vs Ceph. This guide focuses on diagnosing and restoring an existing pool – it maps the operational paths ZFS surfaces in Proxmox, the exact log signatures for each, and the specific commands that fix them, in order of least to most destructive.
Proxmox ZFS Recovery: State and Message-ID Decision Table
| Observed condition | What it means | First safe action |
|---|---|---|
| Pool DEGRADED; member FAULTED/UNAVAIL/REMOVED | Redundancy reduced; pool usually still serves data | Identify the exact member and shared hardware path before replacing |
ZFS-8000-9P | Errors occurred on replicated storage and ZFS repaired the affected data | Investigate the device/path, preserve evidence, then scrub when stable |
ZFS-8000-8A | Permanent data corruption with no valid replica; pool may still be ONLINE | Identify affected objects and restore them, or rebuild if metadata is affected |
| Pool SUSPENDED | I/O failure triggered the configured failmode behavior | Check failmode, restore device connectivity, then clear or reboot as appropriate |
ZFS-8000-72 | Pool metadata corruption | Follow the exact zpool status recovery action; dry-run rewind before committing |
| Pool cannot import | Ownership, missing device/log, hostid, feature, or metadata issue | Run discovery and match the exact import error before forcing |
rpool cannot import during boot | Boot-pool import/device/bootloader problem | Use zpool import -N rpool and separate ZFS recovery from ESP/bootloader repair |
This isn’t the complete OpenZFS state model – a pool can also be exported, importable but owned by another host, or blocked by a hostid mismatch or unsupported feature – but it covers the paths behind most Proxmox incidents. A few searchable message IDs worth recognizing on sight:
| Message ID | Meaning | First direction |
|---|---|---|
ZFS-8000-2Q | Missing device in a replicated configuration | Reconnect the original device and online it, or replace it if sufficient replicas remain |
ZFS-8000-4J | Missing or invalid device label in a replicated configuration | Identify/reconnect or replace the member |
ZFS-8000-9P | Replicated device had errors; ZFS repaired affected data | Investigate device/path, then validate |
ZFS-8000-8A | Permanent data corruption with no valid replica | Restore affected objects or rebuild |
ZFS-8000-72 | Pool metadata corruption | Follow exact clear/import rewind action |
ZFS-8000-EY | Pool last accessed by another system/hostid protection | Confirm ownership before force import |
ZFS-8000-A5 | Pool uses unsupported feature(s) on this host | Use a compatible OpenZFS version |
ZFS-8000-3C | Missing device in a non-replicated configuration | Reattach the exact original device; if permanently lost, restore from backup |
ZFS-8000-5E | Corrupted label in a non-replicated configuration | No replica exists – restore from backup, don’t expect a replace to fix it |
2Q and 4J both cover missing/damaged members where redundancy exists to fall back on. 3C and 5E are the opposite case – a single-disk or otherwise non-replicated vdev, where there’s no second copy to resilver from. Don’t tell a 5E reader to “replace the device” as though ZFS could reconstruct data that has no surviving copy anywhere.
Read zpool status First, Capture Evidence, Identify the Exact Device
Before touching anything, run zpool status -v and read the output completely. The -v flag shows per-device error counts in the READ / WRITE / CKSUM columns. Zero counters mean no currently recorded vdev errors since the last clear – also check the pool-level errors: line, scrub/resilver history, and kernel logs; zero counters alone don’t prove the hardware path is healthy.
Per-device states: ONLINE (healthy), DEGRADED (reduced redundancy), FAULTED (unusable, too many errors), OFFLINE (manually offline), UNAVAIL (can’t be opened, label may be missing), REMOVED (physically removed while active). Don’t rely on the top-line pool health string alone.
Cross-map the ZFS vdev GUID or path to the physical serial/WWN – zpool status doesn’t always show a serial number, and if the failed disk has disappeared entirely, its old /dev/disk/by-id/ symlink may no longer exist either:
zpool status -gLPv
lsblk -o NAME,PATH,SIZE,MODEL,SERIAL,WWN,PARTUUID,FSTYPE
smartctl -i /dev/<device>
ls -l /dev/disk/by-id/
CKSUM errors mean data read from the device didn’t match its expected checksum – causes include media errors, cabling, a controller/HBA fault, RAM corruption, power instability, firmware/driver problems, or stale counters. Several devices with similar errors in the same window points to a shared component (cabling, HBA, backplane, power, RAM); one device alone accumulating errors points to that device and its path:
smartctl -a /dev/sdb
dmesg | grep -E "ata|error|sdb"
Look for ata exception, Emask, link down, or controller resets – replacing the disk won’t fix a bad cable.
ZFS and SMART answer different questions: ZFS tracks I/O and checksum errors at the filesystem layer, SMART tracks physical drive health indicators. A disk can pass SMART and still generate ZFS errors. Investigation priority (the order most likely to find the actual cause fastest, not a statistical ranking):
zpool status -v– identify which device has errors and which type (READ / WRITE / CKSUM)smartctl -a /dev/sdX(orsmartctl -a /dev/nvme0/nvme smart-log /dev/nvme0for NVMe) – check reallocated sectors, pending sectors, uncorrectable errorsdmesg | grep -E "ata|error"– look for controller-level errorssmartctl -t long /dev/sdX– run an extended SMART test
A non-zero reallocated-sector count is evidence to investigate, not a fixed replacement timetable – rapid growth, pending/uncorrectable sectors, failed self-tests, or correlated ZFS errors raise urgency, a low stable count doesn’t automatically mean “replace this weekend.”
DEGRADED Pools and Missing or Invalid-Label Devices
DEGRADED usually means the pool remains available, but redundancy has been reduced. The urgency depends on the topology, how many error-free replicas remain, backup freshness, and whether error counts are still increasing – a two-way mirror with no remaining redundancy is a different risk than a RAIDZ2 pool still one parity level away from failure. Identify the failed member promptly and stabilize the storage path before starting a resilver.
  pool: rpool
 state: DEGRADED
status: One or more devices has been removed by the administrator.
action: Online the device using 'zpool online' or replace the device
        with 'zpool replace'.
  scan: scrub repaired 0B in 00:04:12 with 0 errors on Sun Jun  1 00:24:26 2026

config:

        NAME                        STATE     READ WRITE CKSUM
        rpool                       DEGRADED     0     0     0
          mirror-0                  DEGRADED     0     0     0
            sda                     ONLINE       0     0     0
            sdb                     FAULTED      8     1    14  too many errors
Before ordering a replacement, correlate the errors:
zpool status -gLPv
journalctl -k --since "24 hours ago" | grep -iE "I/O error|timeout|reset|ata|nvme|scsi"
UNAVAIL is a device state, not a pool-wide verdict: the device may be physically missing, its partition path changed, its label damaged, or the controller simply didn’t expose it. A device ZFS cannot open in a replicated configuration is typically reported as ZFS-8000-2Q; a member whose label is missing or invalid is ZFS-8000-4J. Both can leave the pool DEGRADED, but the fix differs: reconnect and online the original device for 2Q when possible, while 4J needs the label/device state confirmed and the member replaced if the label is unusable:
status: One or more devices could not be used because the label is missing or invalid.994773960251519702 UNAVAIL 0 0 0 was /dev/sdb2Identify before remediating. If the member was only manually offlined, bring it back with the identifier ZFS already knows:
zpool online <pool> <existing-vdev-identifier>zpool online brings an existing configured vdev back online – it doesn’t rebind a missing member to a newly discovered device path, so don’t reach for it with a brand-new path as a general fix. If the member is genuinely missing or damaged, replace it using the vdev GUID or configured identifier from zpool status -gLPv, not an old by-id symlink that may no longer exist:
zpool replace <pool> \
    <FAILED-VDEV-GUID-OR-EXISTING-ID> \
    /dev/disk/by-id/<NEW-DISK-ID>
Use -f only when ZFS rejects a replacement that’s been independently confirmed safe to reuse. Don’t run wipefs as a routine step here – wiping the wrong device destroys labels and makes recovery substantially harder.
No redundancy to fall back on: ZFS-8000-3C and ZFS-8000-5E
3C is a missing device in a non-replicated (single-disk) vdev – reconnect the exact original device if it’s only temporarily gone; if it’s permanently lost, there’s no replica to rebuild from, restore from backup. 5E is a corrupted label in a non-replicated configuration – no replica exists, so the fix is recreate-and-restore, not “replace,” since there’s nothing to resilver against.
Replacing a failed data-pool disk
- Cross-map the failed vdev GUID/path from
zpool status -gLPvto its physical serial or WWN usinglsblk, SMART, and enclosure information – don’t assumezpool statusshows the serial directly - Confirm the replacement disk has an equal or greater usable sector count than the failed one
- Confirm you are using
/dev/disk/by-id/paths for the new device – not/dev/sdX - Confirm no other pool member is showing errors before starting resilver
# Identify disks
ls -l /dev/disk/by-id/ | grep -v part
zpool status -v

# Replace - start without -f; add it only if ZFS rejects the target because of
# existing labels or membership you've independently confirmed safe to reuse
zpool replace <pool> <FAILED-VDEV-GUID-OR-EXISTING-ID> /dev/disk/by-id/<NEW-DISK-ID>

# Watch resilver progress
zpool status
Resilver duration ranges from minutes to many hours or days, depending on allocated data, topology, device speed, workload, and error retries – use zpool status for the actual estimate rather than assuming a fixed number. Don’t reboot during resilver unless necessary; ZFS resumes after reboot but you lose progress time. autoexpand is optional and only matters when growing the pool after replacing all required members with larger devices:
zpool set autoexpand=on <pool>ZFS doesn’t automatically reset error counters after a resilver, and a successful resilver only means the resilvered blocks were readable during the operation, not that the disk is healthy going forward. Capture the current state before clearing anything:
zpool status -v > /root/zpool-status-before.txt
journalctl -k --since "24 hours ago" > /root/kernel-storage-before.txt
Then, once the hardware path is confirmed stable – not automatically the moment the resilver finishes – clear counters and scrub:
zpool clear <pool>
zpool scrub <pool>
Replacing a Proxmox Boot Disk (rpool)
rpool replacement has extra Proxmox-specific steps, and skipping them means the replacement disk won’t boot if the surviving disk later fails – a recurring forum pattern: resilver completes, zpool status shows ONLINE for both members, recovery looks done, the surviving disk fails months later, and the host won’t boot from the “replaced” one.
Confirm the current boot configuration before touching partitions – UEFI vs legacy BIOS, systemd-boot vs GRUB, Secure Boot, and partition layout all change the correct commands:
proxmox-boot-tool status
lsblk -o NAME,SIZE,FSTYPE,PARTTYPE,PARTUUID,MOUNTPOINTS
efibootmgr -v
Two disks sold with the same nominal size can differ by a few sectors. Confirm the replacement has an equal or greater usable sector count than the surviving disk’s partition layout requires before copying anything:
blockdev --getsz /dev/SURVIVING-DISK
blockdev --getsz /dev/NEW-DISKsgdisk /dev/SURVIVING-DISK -R /dev/NEW-DISK
# Randomize GUIDs (required - identical GUIDs cause boot failures)
sgdisk -G /dev/NEW-DISKReplace the member in ZFS. If the failed disk is no longer visible, its old by-id symlink may not exist either – use the existing configured identifier or vdev GUID shown by zpool status -gLPv rpool for the failed member instead, and a stable by-id path only for the new partition. The boot-pool sequence uses -f because the copied partition table can carry over old signatures – only run it once the new disk, copied partition layout, and target ZFS partition have been positively identified, not as a routine default:
zpool status -gLPv rpool

zpool replace -f rpool \
    <FAILED-VDEV-GUID-OR-CONFIGURED-ID> \
    /dev/disk/by-id/<NEW-ZFS-PARTITION>
Bootloader setup doesn’t need to wait for the full resilver – register it promptly so the host regains boot redundancy sooner. proxmox-boot-tool can manage systemd-boot, GRUB on UEFI, or GRUB with Secure Boot, so confirm which one this host uses first:
proxmox-boot-tool statusFormat the new ESP once – format is destructive, use it only for a new replacement disk or a deliberate recreate, never on an existing synced ESP just because it looks out of sync:
proxmox-boot-tool format /dev/NEW-DISK-part2Initialize it matching the bootloader mode status actually showed:
proxmox-boot-tool init /dev/NEW-DISK-part2
# or, if status showed GRUB:
proxmox-boot-tool init /dev/NEW-DISK-part2 grub
Verify boot and resilver state – the surviving and replacement ESPs should both appear configured and synchronized:
proxmox-boot-tool status
zpool status rpool
If the replacement ESP still shows NOT SYNCED, don’t reformat it. refresh updates already-configured ESPs, clean removes stale entries for ESPs that no longer exist, and if the new ESP was simply never registered, re-run init with the correct bootloader mode instead:
# Inspect first
proxmox-boot-tool status

# Refresh already-registered ESPs
proxmox-boot-tool refresh

# Only when status shows stale entries for ESPs that no longer exist
proxmox-boot-tool clean
Don’t run clean merely because the replacement ESP shows NOT SYNCED – if the new ESP was never registered, use init with the correct systemd-boot or GRUB mode instead.
Partition numbers like part2 and part3 are common but not universal – confirm them against this host’s actual layout. Legacy BIOS/GRUB installations need separate handling; check the current Proxmox Host Bootloader documentation for the bootloader actually in use.
Permanent Data Errors: ZFS-8000-9P vs ZFS-8000-8A
ZFS-8000-9P means a device in a replicated configuration experienced uncorrectable errors and ZFS repaired the affected data from redundancy. This doesn’t by itself mean the pool is FAULTED – it’s very often still online and serving I/O normally. Inspect the specific device or path that took the hit first, and preserve the status and kernel logs before doing anything else:
zpool status -xv
journalctl -k --since "24 hours ago" | grep -iE "I/O error|timeout|reset|ata|nvme|scsi"
Correct any cable, HBA, or device issue you find. Once the hardware path is stable, clear that device’s error counters using the vdev identifier shown in zpool status – not an arbitrary block-device path from lsblk – then scrub to confirm, or replace the device if errors persist. If errors are shared across multiple members, investigate the shared hardware path before clearing the whole pool. See the zpool-clear reference for scoping clear to one vdev versus the whole pool:
zpool clear <pool> <vdev-identifier>
zpool scrub <pool>
A clean scrub afterward is a good sign, but it doesn’t by itself prove the device is healthy going forward – keep watching the same device after a 9P event rather than assuming it’s resolved.
ZFS-8000-8A is a different animal, and it does not require a FAULTED pool: it means permanent corruption with no valid replica for the affected block, and the pool can remain ONLINE while one or more files, zvol blocks, or metadata objects are unrecoverable. Use zpool status -v to identify named objects when possible:
zpool status -vRestore named files from backup or a known-good source, then verify application-level integrity and keep monitoring – restoring a few named files doesn’t mean the pool is fully healthy again. If metadata or unidentified objects are affected, plan a pool rebuild and restore rather than assuming zpool clear or a scrub can reconstruct data that has no surviving copy; clearing only resets the recorded error state after the underlying issue is addressed, it doesn’t repair anything.
SUSPENDED Pools and failmode
SUSPENDED is one of the most operationally disruptive states. The kernel log entry:
WARNING: Pool 'data' has encountered an uncorrectable I/O failure and has been suspended.A SUSPENDED pool has hit an I/O failure severe enough to activate its configured failmode. Check which one applies before assuming the operational impact or automating a response:
zpool get failmode <pool>- wait (the default) – pool I/O blocks until connectivity is restored and the error is cleared; affected VMs can hang.
- continue – new writes can fail with I/O errors while reads that can still be satisfied continue.
- panic – the host can crash when the failure condition occurs.
Common triggers: consumer NVMe dropping out under sustained load, bad SATA/SAS cables, USB enclosure disconnects, PSU instability.
- Check whether the underlying device path has actually returned (cable reseated, USB device reconnected, controller reset) before doing anything else
- Inspect kernel and controller logs for evidence of what happened
- Identify which guests actually use the affected pool – check
qm config <VMID>for the storage ID;qm listalone doesn’t show which storage each VM uses - Try
zpool clear <pool>only after connectivity is confirmed restored, not before - Avoid starting any new writes while the state is uncertain
- If the node is still responsive, stop only the VMs using the affected pool – a shutdown can itself block when the guest’s storage is suspended, so don’t issue mass shutdowns blindly
- If the host or pool commands remain blocked, plan a controlled reboot or power cycle as the next step, not the first one, while preserving cluster/quorum health
- After reboot, run
zpool status -vbefore starting any VMs back up
# Attempt clear first, only once the device path is confirmed back
zpool clear <pool>

# Identify affected guests by storage, not by guessing
qm config <VMID>
qm shutdown <VMID>
After reboot: if the same path remains FAULTED or UNAVAIL, the disk, cable, backplane, HBA, firmware, power, or another part of the storage path remains unhealthy – not necessarily the disk itself. For USB enclosures: a suspended pool from a USB-attached device tends to suspend again under the same conditions – replace with a direct SATA connection or a PCIe HBA, this is a hardware architecture problem, not a configuration issue.
Prefer ZED (zfs-zed) or an existing Prometheus/Zabbix/Checkmk stack over a hand-rolled cron script – a naive health comparison can fail silently and won’t tell you it stopped working. Alert on ZFS events and command failures, and don’t trigger node fencing directly from a basic text comparison; that needs a tested design integrated with your actual HA setup.
Cannot Import a ZFS Pool in Proxmox
“Cannot import” has several causes, each needing a different check: the pool already active elsewhere, a hostid mismatch (ZFS-8000-EY), a missing device, a missing SLOG, damaged metadata, an unsupported feature flag (ZFS-8000-A5), or a Proxmox storage config referencing a mismatched pool name.
# List all visible pools without importing
zpool import

# List available disks by stable ID
ls -l /dev/disk/by-id/
If the pool appears in the output, branch by cause rather than reaching for one universal ladder:
- Standard import –
zpool import <pool> - Import by stable path –
zpool import -d /dev/disk/by-id <pool> - Read-only import for inspection – imports without mounting datasets, no writes:
mkdir -p /mnt/zfs-recoveryzpool import -N -o readonly=on -R /mnt/zfs-recovery <pool>
Export before any write-capable step once done – a pool imported read-only can’t be re-imported read-write while still imported:zpool export <pool> - Ownership/hostid branch – only after confirming the pool isn’t active elsewhere and the export was unclean on otherwise healthy hardware:
zpool import -f <pool>. Never the default fourth step. Full flags: zpool-import reference. - Missing log device branch – only after accepting recent synchronous transactions on the missing log device may be unavailable:
zpool import -m <pool> - Metadata damage branch – see the checkpoint and rewind ladder below; don’t substitute a plain import for
72-style damage
Proxmox cannot import rpool during boot
This is a different failure from a data pool that won’t import on an otherwise-booted host: here, Proxmox drops to an initramfs BusyBox shell before the system finishes booting at all.
Failed to import pool 'rpool'
Manually import the pool and exit
Or:
cannot import 'rpool': I/O errorUse the initramfs shell only to identify devices and import rpool without mounting datasets automatically. If the ordinary import reports a hostid/ownership warning, investigate it before adding -f – don’t turn -f into the default initramfs command:
zpool import
zpool import -N rpool
If import succeeds, continue the boot sequence:
exitAfter boot, capture evidence before assuming the failure was only boot timing:
zpool status -gLPv rpool
journalctl -b -k
proxmox-boot-tool status
Perform initramfs and bootloader repairs after the host boots, or from a correctly prepared rescue/chroot environment – not directly from the limited initramfs shell:
update-initramfs -u -k all
proxmox-boot-tool status
Any EFI partition showing NOT SYNCED needs the correct init command for the bootloader mode in use – see the boot-disk replacement section above.
“No such pool available”
This means ZFS itself can’t find the pool by that name – distinct from a pool that’s visible but won’t fully import. Check in this order rather than jumping to zpool create, which creates a new empty pool and can destroy any remaining recovery options on the old one:
zpool list
zpool import
ls -l /dev/disk/by-id/
pvesm status
cat /etc/pve/storage.cfg
Common causes: the pool was exported and never re-imported, the import genuinely failed and needs the branches above, the storage entry in /etc/pve/storage.cfg references a pool name that was renamed or never matched, the disks aren’t currently visible to the host, or the node is looking for a pool that’s actually owned and mounted on a different node in the cluster.
Pool Metadata Corruption: ZFS-8000-72 and the Rewind Ladder
A FAULTED pool is completely inaccessible – no reads, no writes. VMs using that pool stop, freeze, or throw I/O errors to the guest depending on timing; see Proxmox VM Won’t Start if a guest doesn’t recover cleanly once the pool is back. FAULTED occurs when a top-level vdev loses more members than parity allows, or pool-wide metadata is corrupted. ZFS-8000-72 is one of the most serious pool-metadata failure scenarios – the pool’s internal bookkeeping is damaged. 3C, 5E, and a missing top-level vdev can also result in complete pool loss.
Follow the exact recovery action zpool status or zpool import actually displays for this pool, rather than a generic sequence. zpool clear -F applies to an active imported pool; zpool import -F applies to an import attempt – don’t interchange them.
If the pool is already imported and reporting 72-style metadata damage, preview before committing:
# Preview the recovery and estimated transaction loss first
zpool clear -F -n <pool>

# Commit only after accepting the reported loss
zpool clear -F <pool>
Run these only when the exact zpool status action recommends zpool clear -F.
If the pool isn’t imported, start read-only and export before any write-capable step:
zpool import
zpool import -N -o readonly=on -R /mnt/zfs-recovery <pool>
# When inspection is complete, export before any write-capable recovery:
zpool export <pool>
Before any destructive rewind, check whether this pool has a checkpoint – it only exists if one was created earlier, and a checkpoint isn’t a generic recovery copy:
zpool status <pool>
zpool list -o name,health,checkpoint <pool>
If a checkpoint exists, preview it read-only before committing to a rewind – this doesn’t touch the current state:
mkdir -p /mnt/zfs-checkpoint
zpool import --rewind-to-checkpoint -N -o readonly=on -R /mnt/zfs-checkpoint <pool>
# Inspect the checkpointed state, then export:
zpool export <pool>
A committed checkpoint rewind discards all changes made after the checkpoint and can’t be undone. If rollback is genuinely needed instead, preview it first without forcing anything:
zpool import -F -n <pool>Add -f only after independently confirming the pool isn’t active on another host and any hostid warning is stale:
zpool import -fF -n <pool>Commit only after accepting the transaction loss the dry run showed:
zpool import -fF <pool>Treat extreme rewind (-X) as an expert-supervised last resort, not a normal escalation step – it can produce an inconsistent pool. Image the drives first if the data is irreplaceable, and work from the image, not the originals.
-f.
When to Declare the Pool Unrecoverable
Move to backup restore when the topology has lost an irreplaceable top-level vdev, OpenZFS’s exact recovery action fails, no acceptable checkpoint or rewind is available, the predicted loss is unacceptable, or permanent metadata corruption blocks a usable import. A failed read-only import alone doesn’t prove the pool is unrecoverable – checkpoint and rollback options may still be worth evaluating first.
Stop writing to the original devices before declaring them unrecoverable – discovery commands don’t overwrite pool regions, but write-capable imports, rollback attempts, and repeated recovery tries do, and each narrows what a data-recovery service could still pull off the original media. If the data is critical, image the drives first and work from the image. This is exactly why “RAID is not a backup” is the single lesson behind most total data loss stories in this community.
Restoring from PBS After Pool Loss
When the escalation ladder reaches the last step – the pool is unrecoverable and you’ve stopped writing to the disks – the question shifts from “can I save the pool” to “how do I restore from Proxmox Backup Server.”
First, rebuild the storage before restoring anything. Recreate the ZFS pool with the correct topology on a fresh install or after replacing the failed disks – restoring VMs to a still-degraded pool under pressure is a common way to create a second incident.
Second, verify your most recent PBS backup before starting any restore. From the PBS web UI: Datastore -> Content -> select the relevant group/snapshot -> Verify, or check the datastore’s verification job history. From the PBS shell, use the management command – it’s datastore-wide and, by default, can skip backups already considered recently verified:
proxmox-backup-manager verify <datastore> --ignore-verified falseFull command reference for the current PBS release.
During an active recovery, review the most recent verification status first and verify the specific group/snapshot you need before running a full-datastore pass – a verified, targeted check is often faster and safer than an unnecessary complete re-verification, or than repeated write-capable recovery attempts on a pool that’s already past saving.
Third, restore using the Proxmox GUI (Datacenter -> Storage -> PBS datastore -> Restore) or from the command line for bulk restores. Pull the exact backup volume ID from pvesm list or the GUI rather than guessing the format:
pvesm list <PBS-STORAGE>
qmrestore <BACKUP-VOLUME-ID> <NEW-VMID> --storage <TARGET-STORAGE>
Choose an unused VMID explicitly if you’re restoring as a separate VM – that’s what actually avoids a VMID conflict. --unique is a different option; it assigns newly generated unique guest properties such as MAC addresses, it’s not a substitute for picking a distinct VMID. For a full node rebuild after storage failure, the PBS restore walkthrough covers the complete recovery path including cluster reintegration and storage re-configuration.
Topology, Redundancy, and Cache Devices
| Topology | Min disks | Survives (per vdev) | Resilver risk |
|---|---|---|---|
| Mirror | 2 | All-but-one member | Fast resilver, low window |
| RAIDZ1 | 3 | 1 disk loss | No remaining parity margin during resilver |
| RAIDZ2 | 4 | 2 disk losses | One additional failure tolerated during resilver |
| RAIDZ3 | 5 | 3 disk losses | Two additional failures tolerated during resilver |
These tolerances apply within a single top-level vdev, not the whole pool – losing any complete top-level data vdev can make the entire pool unavailable, and a special vdev’s loss can be pool-fatal too. After one RAIDZ1 member fails, that vdev has no remaining parity margin during replacement – an unreadable block hit mid-resilver can become permanent corruption, from one file to pool-wide.
For VM storage, the official Proxmox ZFS documentation recommends mirror vdevs over RAIDZ for IOPS. RAIDZ write amplification on ZVOLs is significant – an 8k write on RAIDZ2 with ashift=12 generates 16k of actual disk I/O – so a 4-disk RAIDZ2 offers no space advantage over two mirrors and is substantially slower for random I/O.
L2ARC loss doesn’t destroy primary pool data – cached blocks can be read again from the main pool, performance may drop, pool operations continue. Whether the cache persists across a reboot depends on the OpenZFS version and configuration. Remove a faulted cache device and move on:
zpool remove <pool> /dev/disk/by-id/<CACHE-DEVICE>SLOG/ZIL loss is a bounded risk, not zero risk, and not a guaranteed clean fallback in every case – the outcome depends on whether the pool remains imported, whether the log device is merely faulted or fully missing, and whether import-time log replay is required. While the pool is running, ZFS can continue using the main-pool intent log after a separate log-device problem in many configurations. Importing with a missing log device is a separate recovery decision and may discard uncommitted synchronous transactions:
zpool import -m <pool>After a power outage specifically, ZFS replays the ZIL on import to recover acknowledged-but-uncommitted writes; if the SLOG lacked power-loss protection, the most recent synchronous writes may still be lost, and the exact window depends on workload rather than a fixed time figure. For databases or NFS with synchronous write requirements, mirror the SLOG and use only enterprise SSDs with power-loss protection (capacitor-backed). ARC is RAM, always lost on reboot – no recovery step exists or is needed.
Common Mistakes That Make ZFS Failures Worse
Pulling the wrong disk. In unlabeled bays, operators have removed the healthy mirror member instead of the failed one, dropping the pool from DEGRADED to fully offline. Label bays with serial numbers, and confirm the target by GUID and serial, not bay position.
Wiping a disk to “fix” UNAVAIL or invalid-label. wipefs removes filesystem and partition signatures outright. Used on the wrong device, or before confirming which disk actually failed, it turns an easy recovery into a hard one.
Running zpool import -f without confirming ownership. Can corrupt a pool still active elsewhere or on failing hardware – see the ownership branch above.
Running zpool upgrade mid-recovery. Feature-flag upgrades are irreversible. Any compatibility issue with the current kernel or OS locks you out permanently. Never upgrade during an active recovery.
Using /dev/sdX paths in zpool replace. Kernel disk names change between reboots. Always use /dev/disk/by-id/.
Treating a completed resilver as verification. A resilver only proves the resilvered blocks were readable during the operation, not that the disk is healthy going forward. Confirm the hardware path is stable, then scrub – clear counters only after capturing evidence and resolving the underlying cause, not the moment resilver finishes.
FAQ
What is the safest Proxmox ZFS recovery sequence?
Start with zpool status -v (if imported) or zpool import (if not) to identify the exact state and message ID, then match it against the decision table above. Never jump to zpool import -f, a rollback, or a device replacement without confirming the state, the device identity, and that no other host owns the pool.
What does DEGRADED mean, and how urgent is it?
DEGRADED means the pool remains available but redundancy has been reduced – data is accessible and VMs generally keep working. How urgent it is depends on the topology and which member or vdev fails next: a two-way mirror already down to one member has zero remaining redundancy, while a RAIDZ2 pool with one failed disk still has a parity level in reserve. Identify the failed member by GUID and serial, then replace it before the next failure window opens.
How do I replace a failed Proxmox ZFS boot disk?
Confirm the bootloader mode with proxmox-boot-tool status first – systemd-boot, GRUB, and GRUB with Secure Boot need different handling. The replacement disk needs an equal or greater usable sector count, not an exact match. Copy and randomize the partition table, replace the ZFS member by its by-id path, then format and initialize the new ESP matching the bootloader mode shown. Don’t wait for the full resilver before registering the ESP, and don’t reformat an existing synced ESP just because it looks out of sync.
What is the difference between ZFS-8000-9P and ZFS-8000-8A?
9P means a replicated device had errors and ZFS already repaired the affected data from redundancy – the pool is usually still fine, investigate the device and keep watching it. 8A means permanent corruption with no valid replica anywhere – the pool can still be ONLINE, but the affected files, zvol blocks, or metadata objects are actually gone and need restoring from backup, or the pool rebuilt if the damage is in metadata.
How do I recover a SUSPENDED pool?
Check zpool get failmode <pool> first, since the operational impact depends on it. Confirm the underlying device path has actually returned before trying zpool clear <pool>. If commands remain blocked, identify which guests actually use the affected pool (not every VM on the host), stop those, and plan a controlled reboot as the next step rather than the first one. Proxmox staff have reported that HA fencing wasn’t based on ZFS pool health in at least one documented case – verify current behavior and don’t assume storage-aware fencing exists unless you’ve explicitly configured and tested it.
When is zpool import -f appropriate?
Only after confirming the pool wasn’t cleanly exported, isn’t currently active on another host, and the underlying hardware is healthy. Never use -f to force past an ownership or hostid warning you haven’t investigated. For metadata-corrupted pools, use the read-only import path first, then a dry-run rewind before committing to anything destructive, and treat extreme rewind (-X) as an expert-supervised last resort.
When should I stop recovery and restore from PBS?
See the unrecoverable criteria above – lost top-level vdev, failed exact recovery action, no acceptable checkpoint/rewind, or unusable metadata. Stop writing to the original devices first; a verified restore is often safer and faster than continued write-capable recovery attempts on media that’s already past saving.
Final Thoughts
Proxmox ZFS recovery comes down to diagnosis before intervention: the pool state tells you the class of problem, the message ID tells you the specific cause, and the hardware investigation tells you whether the fault is the disk or something upstream of it. Read the state, confirm the cause, then act – most unrecoverable failures trace back to a decision made before the incident, not during it. The same mindset applies to a random crash investigation or a session with Proxmox logs.
Proxmox VE Series
28 articles – Installation · Storage · Networking · HA · Recovery