
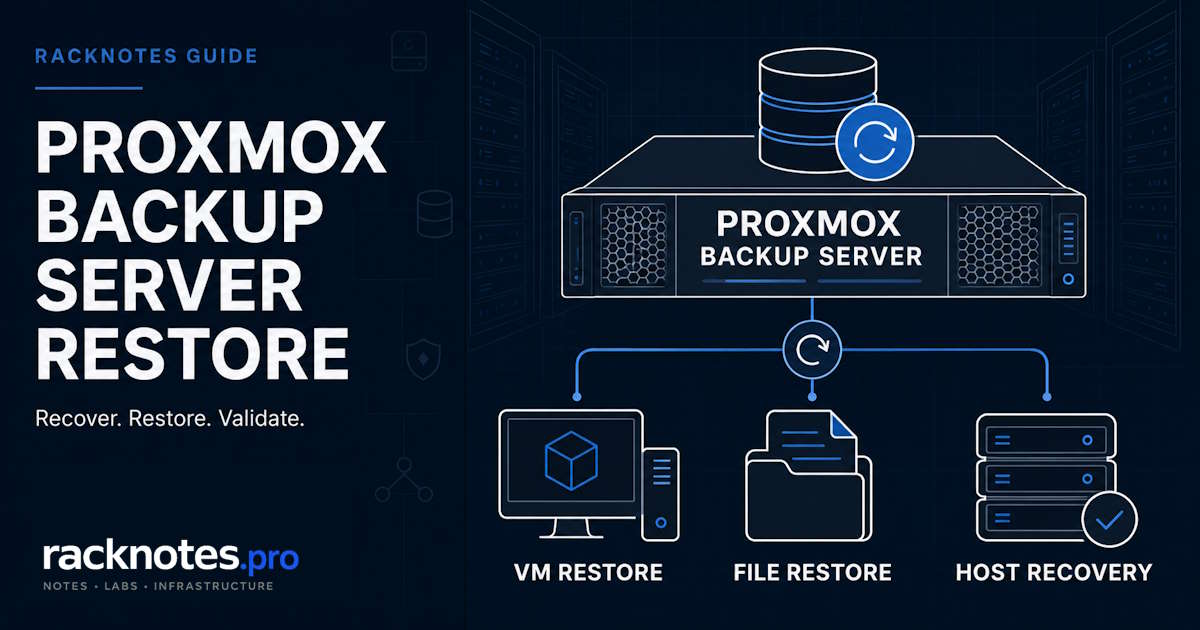
Proxmox Backup Server restore starts in Proxmox VE. To restore a Proxmox VM from backup, select the PBS storage in the PVE resource tree, open Backups, choose the snapshot, and click Restore. Set the target VMID and storage. Use Unique when restoring a parallel test copy alongside the original. From the CLI, list the exact backup volume with pvesm list <PBS-STORAGE-ID> --content backup and restore with qmrestore. For LXC containers, use pct restore. For individual files, use the GUI File Restore browser or proxmox-file-restore on the CLI.
This guide focuses on how to restore a Proxmox backup stored on PBS. Local or NFS vzdump archives use the same PVE Restore action, but the backup source is different.
A restore test turns a backup strategy into something you can measure rather than simply trust.
- Before restoring, confirm PBS reachability, certificate trust or fingerprint, encryption-key availability, and sufficient target storage capacity.
- For a test restore alongside the original: new VMID,
--unique 1, isolated bridge. For an LXC parallel test restore: new CTID,--unique 1for a new MAC, isolated network. - Check the task log first via
pvenode task log <UPID>. - A standard Proxmox VE guest backup on PBS does not provide a bare-metal restore of the PVE host OS or cluster configuration. Rebuild PVE first, then restore guests.
- Scheduled PBS verify jobs catch corruption before you need the backup. Without them, a failed restore is often the first indication of a problem.
Choose Your Restore Type
| What you need | Use |
|---|---|
| Restore an entire VM | VM restore (GUI or qmrestore) |
| Restore an entire LXC container | CT restore (GUI or pct restore) |
| Recover one file or directory | File Restore (GUI browser or proxmox-file-restore) |
| Test a backup without replacing production | New VMID/CTID + --unique 1 + isolated network |
| Restore to another PVE node | Cross-node restore – same procedure, different host |
| Rebuild after PVE host failure | Rebuild PVE first, then restore guests from PBS |
| Recover a PBS datastore | Datastore recovery workflow |
Before You Restore
Check four prerequisites before restoring. A problem with any of them can prevent the restore from starting or cause it to fail before completion.
PBS must be reachable from the PVE host. The PVE node needs PBS added as a storage backend with the correct IP, port (8007 by default), datastore name, and credentials. Verify with pvesm status. If the PBS storage entry shows an error, the restore dialog will be empty.
Certificate trust or fingerprint must match. PBS uses TLS. When the server uses a self-signed certificate, the configured SHA-256 fingerprint must match. If PBS is rebuilt or its certificate is replaced, the pinned fingerprint changes and the PVE storage definition must be updated. A fingerprint mismatch produces an SSL error that looks like a network problem until you check the actual task log.
Encryption keys must be present. There are three distinct cases: PVE-integrated encrypted PBS storage stores the client-side key at /etc/pve/priv/storage/<STORAGE-ID>.enc (cluster-wide, in pmxcfs); standalone proxmox-backup-client jobs keep the key at ~/.config/proxmox-backup/encryption-key.json on whichever host ran the job; a configured master public key stores an encrypted copy with each backup, but recovering from that requires the separately-protected master private key. No key means no decryption. This is easy to miss in cross-host restores. The Proxmox Backup Client encryption and master-key documentation covers key export and management.
Target storage must have enough space. Capacity reporting differs between ZFS, LVM-thin, Ceph, and other Proxmox storage backends. Check the logical size of every VM or CT volume shown in the restore dialog and compare against available capacity via pvesm status. Do not use the compressed PBS snapshot size as the restore-space requirement. Thin-provisioned targets need enough real free space for the data written during restore and subsequent guest growth.
Commands below target current supported PVE/PBS releases. Verify available flags with qmrestore help and pct restore --help on your specific installation before scripting anything.
How to Restore a Proxmox VM from PBS Backup
In Proxmox VE, select the PBS storage in the resource tree, open Backups, choose the VM snapshot, and click Restore. Set a target VMID and storage. Use a new VMID plus Unique for a parallel test restore; use the original VMID only when deliberately replacing a failed VM.
Restore a Proxmox VM in the Web GUI
- In the PVE resource tree, select the PBS storage and open Backups.
- Find the VM ID, select the snapshot, click Restore.
- Set target VMID (new ID for testing, original for replacement).
- Set target storage.
- Enable Unique to assign new virtual NIC MAC addresses.
- Click Restore. Do not enable Start after restore – boot manually after confirming the task completed without errors.
Restore a Proxmox VM with qmrestore (CLI)
Find the exact backup volume ID first:
pvesm list <PBS-STORAGE-ID> --content backupTest restore alongside the original:
qmrestore '<EXACT-BACKUP-VOLUME-ID>' 9100 \
  --storage local-lvm \
  --unique 1
Production replacement of a confirmed failed VM:
qmrestore '<EXACT-BACKUP-VOLUME-ID>' 100 \
  --storage local-lvm \
  --force 1
Use --force only after confirming the original VM definition should genuinely be overwritten. Never use it against a running VM to test a backup.
Verify the VM After Restore
Boot on an isolated bridge or with the NIC detached. Confirm the OS boots, critical services start, and data timestamps match the expected backup window. Then reconnect to production networking.
--unique 1 generates new virtual NIC MAC addresses. It does not regenerate the guest OS hostname, machine ID, SSH host keys, or application identity. For a parallel test restore where both copies might run simultaneously, check those separately.
How to Restore an LXC Container from Proxmox Backup Server
The procedure mirrors VM restore, with a few container-specific considerations.
Restore an LXC Container in the GUI
- In the PVE resource tree, select the PBS storage and open Backups.
- Find the container ID, select the snapshot, click Restore.
- Set a free CTID (new ID for testing, original for replacement).
- Set target storage.
- Enable Unique for a parallel test alongside the original.
- Click Restore.
Restore an LXC Container with pct restore
pvesm list <PBS-STORAGE-ID> --content backupTest restore alongside the original. --unique 1 assigns a new random Ethernet address, preventing MAC conflicts when both containers run on the same network:
pct restore 9101 '<EXACT-BACKUP-VOLUME-ID>' \
  --storage local-lvm \
  --unique 1
Direct replacement:
pct restore 101 '<EXACT-BACKUP-VOLUME-ID>' \
  --storage local-lvm \
  --force 1
LXC Checks After Restore
Bind and device mount contents are not included in PBS container backups. Proxmox restores the CT configuration entry, but the contents of host-path bind mounts and device mounts are never backed up as part of the guest. The restored CT may start with the mount definition intact while the external source is missing, unmounted, or empty. The LXC bind mounts guide covers which mount types get backed up and how to verify them after a restore.
After booting in isolation, check the container’s hostname and IP configuration (they come from the backup state, not the new host), verify application identity and any licensing tied to MAC or machine ID, and confirm any scheduled jobs that reference the old CTID.
How to Restore Individual Files from PBS
Use file restore when only one file or directory is needed and a full VM restore would be excessive.
Restore Individual Files in the GUI
In PVE, select the PBS storage in the resource tree, open Backups, click a backup snapshot, then select File Restore. A browser-based file tree opens. Navigate to the file and click Download. The file saves to your workstation; copy it into the VM via SCP or SFTP. This works from any browser, but large files can be slow through the browser path.
Restore Files with proxmox-file-restore
List the snapshot contents first:
proxmox-file-restore list '<SNAPSHOT>' /Extract a specific file to standard output:
proxmox-file-restore extract \
  '<SNAPSHOT>' \
  '<EXACT-INTERNAL-PATH>' \
- > recovered-fileA file written to stdout and recreated through shell redirection is owned by the user running the shell and does not automatically retain the original owner, ACLs, xattrs, or capabilities. If those attributes matter, restore to a target directory or use an archive-aware method, then verify metadata before copying the file back into the guest. The Proxmox Backup Server CLI tools documentation covers proxmox-file-restore in detail.
After recovery, compare the file against expected content. If it is a config file, run a syntax check before placing it back (nginx -t, sshd -t).
Restore a Proxmox Backup to a New VMID
For any Proxmox Backup Server restore you have not validated yet, the safest default is to restore to a free VMID instead of the original one.
- Pick a VMID that is not in use anywhere in the cluster – not just on the current node.
- Use
--unique 1if the original VM might still be reachable on the network. - Boot on an isolated bridge first.
- Check application identity separately: hostname, machine ID, licensing, scheduled jobs, and any monitoring or HA jobs that reference the old VMID do not follow automatically.
- Delete the test VM only after confirming the restore is good – not immediately after it boots.
qmrestore '<EXACT-BACKUP-VOLUME-ID>' 9100 \
  --storage local-lvm \
  --unique 1
Restore a Proxmox Backup to Another Node or New Host
The destination PVE node must be able to access the PBS datastore. Once PBS is available on the destination, select the backup, choose a free VMID and target storage, and restore normally. The restore mechanics are identical to a full VM restore; the differences appear in the post-restore compatibility checks.
NIC bridge mismatch is the most common post-restore problem. If the destination uses different bridge names than the source, VMs restore successfully and then have no network access. Fix bridge assignments in PVE’s VM hardware settings before booting, not after. See Proxmox Networking: Bridges, VLANs, Bonds if the destination’s bridge layout is not already documented.
CPU architecture changes require attention. A VM configured with cpu: host exposes the destination host’s CPU feature set. Moving between Intel and AMD, or between different CPU generations, can change visible flags and affect nested virtualization, clustered applications, or licensed software. Use a compatible generic CPU model when cross-host portability is a design requirement.
Storage layout differences. If the source used ZFS and the destination uses LVM-thin, the restore writes to the destination storage selected for the job. If the source had multiple disks across different storage pools, confirm equivalent storage exists on the destination before starting.
Use --unique 1 when source VMs are still running. Without it, the backup’s virtual NIC MAC address is preserved – duplicate MACs on the same network produce intermittent failures that look like VM bugs. This does not touch the guest’s hostname or machine ID; check those separately if both copies might run at once.
Proxmox Backup Server Live Restore
Current Proxmox supports live restore for VM backups from PBS: the VM can start before the full disk restore completes, with reads served from the backup while the remaining blocks copy in the background.
qmrestore '<EXACT-BACKUP-VOLUME-ID>' 100 \
  --storage local-lvm \
  --live-restore 1
Live restore reduces downtime but does not skip post-restore verification. A VM that boots early under live restore still needs the same checks as any other restore path. Performance can be reduced during the live-restore window because reads may still be served from PBS while remaining blocks are copied to the target storage. For latency-sensitive workloads, let the background copy finish before reconnecting to production. Verify this flag is supported by your PVE and PBS version before relying on it under pressure.
Common PBS Restore Errors
| Error or symptom | First check | Likely fix |
|---|---|---|
| SSL error / connection failure | Fingerprint in Datacenter → Storage → [PBS] → Edit | Update fingerprint to match current PBS certificate |
| Decryption failure in task log | /etc/pve/priv/storage/<STORAGE-ID>.enc for PVE-integrated; ~/.config/proxmox-backup/encryption-key.json for standalone jobs | Restore the correct encryption key to the PVE host |
| No space left on device mid-restore | Target storage capacity vs logical VM volume size | Choose storage with sufficient free space; do not use compressed PBS snapshot size as estimate |
| VMID already exists | Cluster-wide VMID conflict, not just current node | Use a new VMID for testing; use --force only to deliberately overwrite a confirmed stale config |
| Target storage not found | Storage enabled on this node, correct content type, sufficient capacity | Select a valid target storage explicitly with --storage |
| Backup not visible in restore dialog | PBS namespace scope and configured user/token ACL | Check namespace and grant read access to the correct datastore or namespace |
| Restored CT missing data after boot | Bind and device mount contents not included in CT backup | Restore external mount content separately |
| Permission denied in task log | PVE user privileges on storage; PBS token access to backup group | Use DatastoreReader for restore-only access; DatastoreBackup for owned-group backup and restore |
Reading the task log:
pvenode task list
pvenode task log <UPID>
pvenode task status <UPID>
For daemon-level errors: journalctl -u pvedaemon and journalctl -u pveproxy on the PVE node; journalctl -u proxmox-backup and journalctl -u proxmox-backup-proxy on the PBS host.
VMID conflict resolution order: Confirm the VM exists in the cluster configuration, then confirm it is not running on another node. If you are testing, use a new VMID. Remove the stale config only after confirming it is genuinely stale, and use --force only after deliberately deciding to overwrite that specific definition.
Namespace and permission failures: PBS separates backup group ownership, namespaces, and token privileges from PVE’s permission model. DatastoreBackup covers backup and restore of owned groups. DatastoreReader covers inspecting and restoring datastore content. Assign whichever fits rather than granting global admin as the first troubleshooting step. See the Proxmox Backup user management documentation for role definitions.
Rebuild a Failed PVE Host and Restore Guests from PBS
A standard Proxmox VE guest backup stored on PBS does not provide a bare-metal restore of the PVE host OS or cluster configuration. PBS restores guest backups – VMs and containers. Rebuilding the failed host is a separate reconstruction process that must happen first.
Once PVE is rebuilt, reconnect PBS and restore the guest backups.
What to document before failure, not after:
- PVE version and enabled repositories
/etc/network/interfacesand bridge/VLAN configuration- Hostname and DNS records
- Storage IDs and backend types
- PBS storage definition and fingerprint
- Encryption key location and export
- Bridge and VLAN naming used by existing VM configs
- PCI passthrough configuration
- HA and resource mapping definitions
- Backup job schedules
Rebuild sequence:
- Install a fresh Proxmox VE. Minimize unnecessary version changes during an incident. Prefer the same supported PVE release family or a newer supported release that can understand the backed-up guest configuration; do not assume an older PVE release can restore configuration created with newer guest features. Run through the post-install checklist before adding PBS storage.
- Configure basic networking. Configure a static IP and a route to the PBS server before doing anything else.
- Add PBS as storage. Datacenter → Storage → Add → Proxmox Backup Server. Fill in server address, datastore, credentials, certificate trust or fingerprint, and namespace. Encryption key is not required to define the storage entry but is required for encrypted restores.
- Restore guests one at a time. Use
pvesm list <PBS-STORAGE-ID> --content backupto find exact volume IDs, thenqmrestorewith original or new VMIDs as appropriate. - Review network configs inside each VM. Different bridge names on the new host mean VMs come up with no network access even though everything else looks correct.
Cluster membership needs a decision, not just a restore. If the failed host was part of a Proxmox cluster, decide whether the node will be replaced under the same identity, removed, or rebuilt fresh. Then follow the documented cluster node replacement or removal workflow. Restoring a stale /etc/pve or corosync.conf onto a live cluster can cause more damage than the original failure.
The PBS encryption key for PVE-integrated encrypted storage lives in pmxcfs at /etc/pve/priv/storage/<STORAGE-ID>.enc, replicated across cluster nodes. Standalone client jobs keep the key wherever that client’s config lives. If you never exported a separate copy and the relevant config is gone with the host, encrypted backups are unrecoverable – no workaround, no recovery path. Export encryption keys and store them separately from both the PVE host and PBS.
Recover or Reattach a PBS Datastore
PBS verification jobs run integrity checks on stored chunks and catch corrupted snapshots before you try to restore them under pressure. Without verification jobs enabled, corruption may surface only when a restore fails. Enable them under Datastore – [datastore name] – Verify Jobs – Add. The Proxmox Backup Server maintenance documentation covers configuration.
If the PBS host is gone but disks are intact:
- Preserve disks read-only where hardware and tooling allow.
- Inspect hardware and filesystem/ZFS health before importing anything.
- Import the ZFS pool in read-only mode for inspection:
zpool import
zpool import -o readonly=on <POOL>
zpool status -v <POOL>
Importing a pool that is still active on another host can corrupt the datastore. Proceed only after confirming the former PBS host can no longer access it. Once the pool and filesystem look healthy, export the read-only import and re-import or mount it normally before reattaching it to PBS. A datastore must be operated by only one PBS instance at a time.
- Verify the datastore root and
.chunkslayout before pointing PBS at it. - Restore PBS configuration from a separate config backup if one exists. All PBS configuration files are under
/etc/proxmox-backup/– back this directory up separately from the datastore. - If no config backup exists, reuse the existing datastore path:
proxmox-backup-manager datastore create <STORE> <PATH> \
--reuse-datastore true- Run a full verification pass before trusting any data:
proxmox-backup-manager verify <STORE> \
--ignore-verified false- Test one file restore and one full guest restore before declaring the datastore recovered.
Damage to one shared chunk can affect multiple snapshots because of deduplication. Identify every impacted restore point from the verify output before pruning anything.
Last-resort offline recovery: When reattaching the datastore normally is not possible but indexes and chunks remain intact:
proxmox-backup-debug recover index <INDEX-FILE> <PATH-TO-.chunks>Treat this as a last resort – not a substitute for the reattach-and-verify procedure above. If the datastore is physically gone with no secondary and no salvageable indexes, there is no PBS restore path.
Secondary PBS sync targets are not automatically independent recovery tiers. If source deletions are propagated via remove-vanished, target-side retention is short, or the same administrative credentials control both systems, the recovery window can disappear. Use separate credentials, independent target-side retention, and an explicit decision on remove-vanished. A verified-only sync option ensures only verified snapshots are synchronized – it does not make the target immutable.
Post-Restore Verification Checklist
- Confirm the PBS restore task completed with status “OK.” Check via
pvenode task log <UPID>or the GUI task log. A task with no GUI errors can still have warnings in the detailed log. - Start on isolated network first. Boot the VM with NIC detached or on a test bridge. Confirm the OS boots, filesystems mount cleanly, and no systemd units are failing (
systemctl --failed). - Check service status inside the VM. Common post-restore issues include services bound to an old IP, licensing tied to hardware identity, filesystems requiring checks after an unclean state, and databases performing crash recovery. For Windows, review Event Viewer, service state, and disk health.
- Validate data timestamps. Compare file modification times against your expected backup window. A technically successful restore from the wrong snapshot is still a failure.
- Check network connectivity after reconnecting. Ping the default gateway, confirm DNS resolves, confirm the application responds. Network success does not confirm application success.
- Record the restore time. This becomes your RTO baseline for future planning.
A successful Proxmox Backup Server restore does not automatically mean the service is recovered. The checklist verifies both the restore itself and the workload after boot.
Frequently Asked Questions
What happens if I lose the PBS encryption key?
Encrypted backups without the key are unrecoverable. No bypass, no recovery path. PBS uses AES-256 encryption with keys that only exist where you put them. Export keys and store them separately from both the PVE host and PBS. This is the prerequisite that cannot be fixed after the fact.
Can I run a Proxmox Backup Server restore without the GUI?
Yes. qmrestore, pct restore, and proxmox-file-restore all work without the GUI. This matters for bare-metal recovery where you have just reinstalled PVE and have no browser session yet. When restoring through a PBS storage already configured in PVE, connection settings and credentials come from that storage definition rather than being supplied per command.
How do I know if a PBS backup is corrupted before I need it?
Enable PBS verification jobs on a schedule matched to your backup frequency, retention window, and datastore size. A verify job reads and validates each chunk against its stored checksum. If a chunk fails, the job reports which snapshots are affected. Without this, the first indication of corruption is usually a failed restore. Enable under Datastore – Verify Jobs – Add.
How long does a Proxmox Backup Server restore take?
Restore time depends more on storage speed and PBS load than on raw link speed. Compression ratio, PBS disk throughput, VM disk layout, and whether live restore is used all matter. Measure a representative restore end-to-end and record both throughput and complete service recovery time. That number – not a generic estimate – is your actual RTO.
Can I restore a PBS backup to a different node than the original?
Yes. A Proxmox Backup Server restore does not require the destination to be the original node, as long as that node has PBS added as storage with the right credentials and certificate trust or fingerprint. The original guest-disk storage ID does not have to exist on the destination. Select a different target storage explicitly with --storage. Bridge names, hardware mappings, PCI passthrough, CPU features, and node-specific resources still require review.
What is the difference between –unique and –force in qmrestore?
--unique 1 generates new virtual NIC MAC addresses during restore. It does not regenerate the guest OS identity, machine ID, SSH host keys, or application IDs. Use it when the original VM may still exist on the network or when running a test restore alongside the original. --force 1 overwrites an existing VM config with the same VMID without prompting. Prefer restoring to a free VMID, or deliberately removing the failed VM’s config, and only reach for --force once overwriting that specific definition is intentional and the original cannot start anywhere else. Using --force without --unique on a VM that still exists elsewhere creates duplicate MACs.
Proxmox VE Series
28 articles – Installation · Storage · Networking · HA · Recovery