
The role is installed and the server has rebooted. Hyper-V Manager opens. Nothing is broken. That’s where most “after install” guides stop – and where operators frequently make the decisions that come back to bite them three months later.
This Hyper-V post-install checklist covers what a competent operator configures before this host runs anything that matters. Each task leads with the decision and the failure it prevents, not just the command.
The install guide covers everything through role verification and the reboot. The conceptual pillar covers what Hyper-V is and how it works. This Hyper-V post-install guide starts after the reboot and ends before you build your first VM.
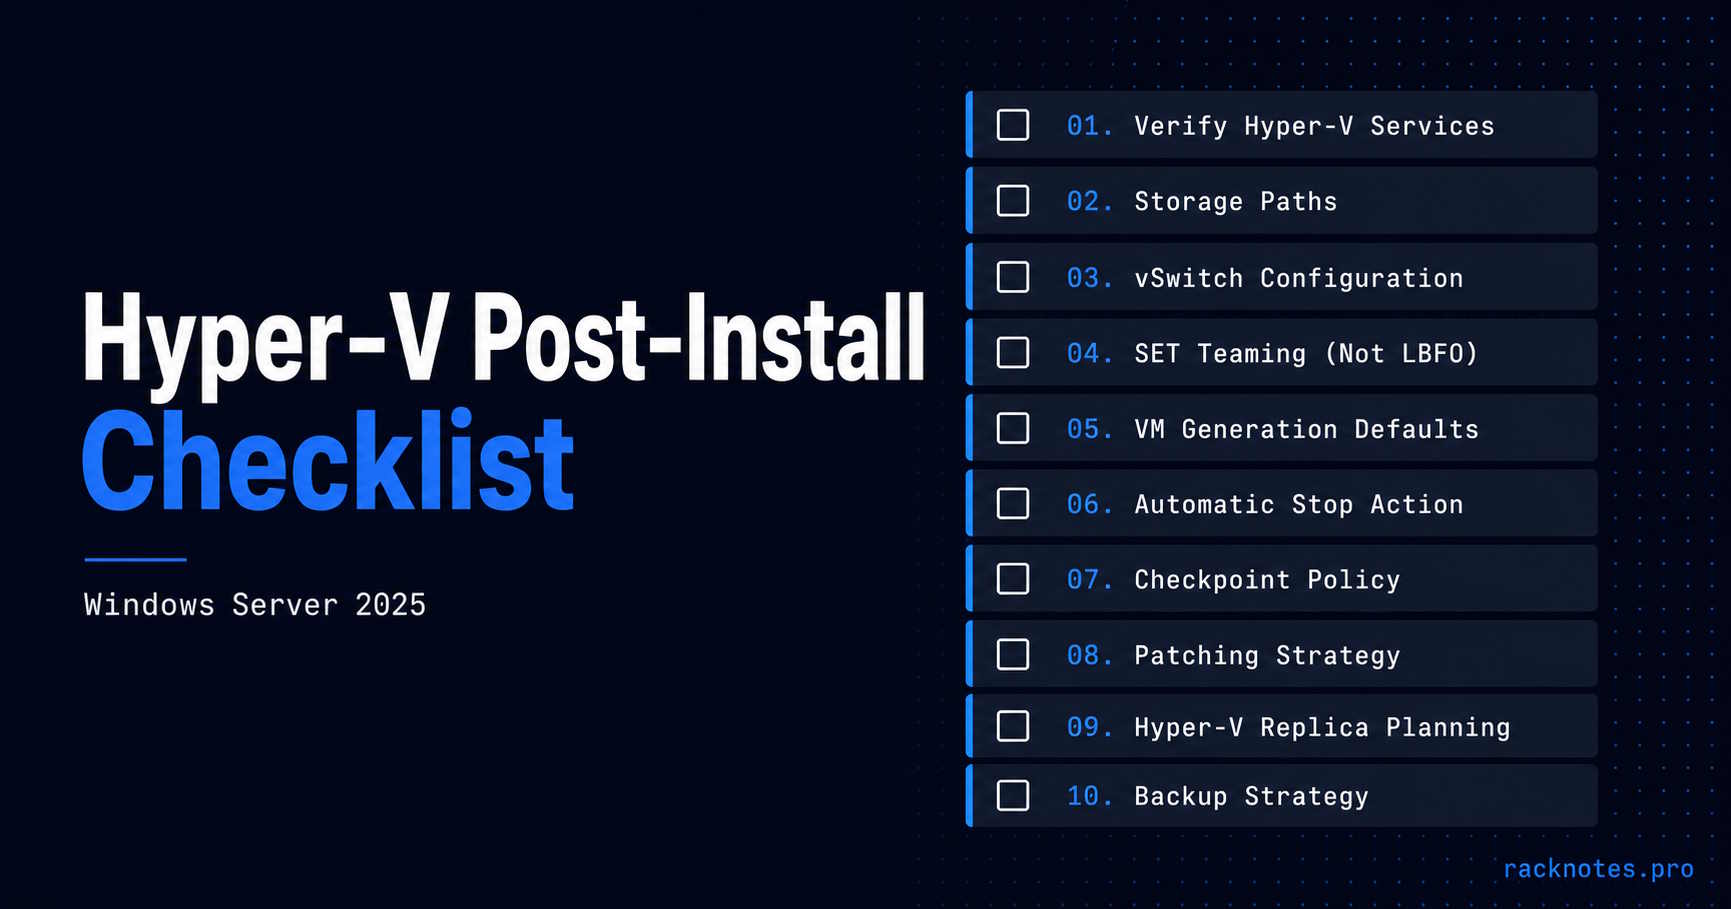
Hyper-V Post-Install Checklist – ten things to confirm before this host runs production workloads:
- Verify Hyper-V services are running
- Move VM and VHD storage off C:
- Create production vSwitch – correct NIC, correct method
- Use SET for Hyper-V vSwitch teaming; binding an LBFO team to a Hyper-V switch is blocked in Windows Server 2025
- Review VM generation defaults – Gen 2 is now the WS2025 wizard default
- Review Automatic Stop Action per workload and confirm sufficient save-state capacity
- Review Automatic Start Action and startup delay for dependency order
- Enable Integration Services; treat Enhanced Session Mode as optional convenience
- Configure remote management before the server goes headless
- Define checkpoint policy before anyone takes one in anger
- Decide patching model and confirm backup plan
| Task | Why It Matters | Risk If Skipped |
|---|---|---|
| Move VM storage off C: | Prevent system volume exhaustion | Host instability, failed VM saves |
| Configure vSwitch correctly | Network connectivity for VMs | Management NIC loss, console-only recovery |
| Review Automatic Stop Action per workload and verify sufficient save-state capacity | Predictable shutdown behavior and disk headroom | Extended shutdown, failed save, or unplanned application restart behavior |
| Set checkpoint policy | Prevent AVHDX sprawl | Storage exhaustion, unrecoverable chains |
| Plan patching model | Predictable maintenance windows | Unplanned VM downtime, mid-incident decisions |
| Confirm backup strategy | Recoverability from failure | Data loss with no restore path |
1. Verify the Install Actually Took
Before configuring anything, confirm the role is in the right state. This is the first step in any Hyper-V post-install process – Windows sometimes installs features partially without surfacing an error, and Hyper-V has several dependent services that don’t always start cleanly on first boot.
Get-WindowsFeature -Name Hyper-VAfter the required reboot, confirm InstallState is Installed. If not, review Server Manager and DISM servicing logs before continuing.
Then confirm host management is responding:
Get-Service vmms
Get-VMHost
vmms is the Hyper-V Virtual Machine Management service and is the primary host-management check – it should show Running. vmcompute is the Host Compute Service used by Windows compute-system APIs for virtual machines and containers; it can be a trigger-start service, so don’t treat it as required to already show Running on a freshly rebooted host. Check it specifically if VM or container startup operations fail:
Get-Service vmcomputeIf vmms is stopped or Get-VMHost errors, check Event Viewer > Windows Logs > System for the underlying error before proceeding.
Open Hyper-V Manager and confirm it connects to the local host without error. No virtual switches, no VMs – that’s the correct starting state.
2. Move Default VM and VHD Storage Off C:
Hyper-V stores VM configuration, runtime-state, checkpoint, and virtual-disk files in separate locations. Query the current host rather than assuming every installation uses the same defaults:
Get-VMHost | Select-Object VirtualMachinePath, VirtualHardDiskPathOn a typical fresh installation, VM configuration files default under %ProgramData%\Microsoft\Windows\Hyper-V, while Hyper-V Manager uses %Public%\Documents\Hyper-V\Virtual Hard Disks as the default VHD location – treat these as common examples to verify, not universal constants, since management tooling, host configuration, and deployment automation can change them. Leave either default on the system volume and you will eventually put pressure on it – faster than you expect once you factor in memory reservation files (covered in section 4).
Create the destination folders and confirm permissions before relocating the defaults:
New-Item -Path "D:\Hyper-V\VMs" -ItemType Directory -Force
New-Item -Path "D:\Hyper-V\VHDs" -ItemType Directory -Force

Set-VMHost -VirtualMachinePath "D:\Hyper-V\VMs" -VirtualHardDiskPath "D:\Hyper-V\VHDs"
Replace D: with whichever volume is dedicated to VM storage – for SMB or cluster storage, point these at the supported UNC or CSV path for that design rather than a local drive letter. Verify:
(Get-VMHost).VirtualMachinePath
(Get-VMHost).VirtualHardDiskPath
The default VHD path is a management-tool default used by Hyper-V Manager and Windows Admin Center workflows, not an enforced storage policy – automation should still supply explicit paths when it creates VHDX files and VMs. Existing VMs are not affected retroactively. If you’ve already built VMs on C:, relocate them before the volume fills – not after.
3. Build Your Virtual Switch Correctly the First Time
The virtual switch is a high-impact decision if you get it wrong – and one operators frequently rush past during the Hyper-V post-install phase. A misconfigured External switch can interrupt host management connectivity and leave you remediating from console. Microsoft’s Hyper-V networking planning guide covers the full topology options; what follows is the operator-first version.
Three switch types:
- External: binds to a physical NIC, gives VMs access to the physical network. Optionally shares the NIC with the Hyper-V host.
- Internal: communication between the host and connected VMs, plus VM-to-VM communication on that switch. It has no physical-network access unless the host provides routing or NAT.
- Private: VM-to-VM communication only. No host access.
Create and validate the switch before provisioning any VM that needs network connectivity. Hyper-V can create an isolated VM without a switch, but defining the production network design first avoids disruptive rewiring later. Most environments need at least one External switch for production VM traffic. Binding it to the current management adapter is supported, but it can interrupt connectivity while Windows creates the management OS virtual adapter, since switch creation triggers adapter re-enumeration. Use console or out-of-band access, preserve -AllowManagementOS $true when the host must share the uplink, and make the change in a maintenance window.
# Single NIC, no teaming
New-VMSwitch -Name "vSwitch-Production" -NetAdapterName "Ethernet" -AllowManagementOS $true
-AllowManagementOS $true shares the NIC with the host. Set it to $false if the host has a separate dedicated management NIC. After switch creation, host IP configuration belongs on the management OS virtual adapter (vEthernet), not on the bound physical NIC – verify address, VLAN, DNS, gateway, and management connectivity before leaving the console.
LBFO Teaming Is Blocked in Windows Server 2025
This is where operators with Windows Server 2016 or 2019 habits get caught. In Windows Server 2025, attaching a Hyper-V virtual switch to an LBFO NIC team is explicitly blocked at the platform level – the operation fails with an explicit error. LBFO itself isn’t removed from Windows Server; it remains available for non-Hyper-V scenarios, but Switch Embedded Teaming (SET) is the only supported teaming method for Hyper-V virtual switches.
SET creates the team inside the vSwitch itself rather than at the NIC driver level. Use matching adapters, drivers, firmware, speed, and offload capabilities across the SET team, and validate RDMA/DCB as a complete supported design when storage traffic depends on it:
New-VMSwitch -Name "vSwitch-SET" -NetAdapterName "NIC1","NIC2" -EnableEmbeddedTeaming $trueIf you built LBFO teams before enabling Hyper-V, remove them and rebuild using SET before creating any virtual switches. For the architectural explanation of why SET replaced LBFO for Hyper-V workloads, see What Is Hyper-V?
# Verify switch and teaming mode
Get-VMSwitch | Select-Object Name, SwitchType, EmbeddedTeamingEnabled, NetAdapterInterfaceDescriptions
4. Fix the VM Hardware Defaults Before You Build Anything
Review these VM defaults before provisioning. Windows Server 2025 changes the New VM Wizard to Generation 2 by default, while other long-standing settings such as Automatic Stop Action still need a workload-specific review.
Generation 2 Is Now the Wizard Default
The New Virtual Machine wizard defaults to Generation 2 in Windows Server 2025. Generation 2 VMs use UEFI firmware, support Secure Boot, and require a guest OS that can boot in UEFI mode. Generation 2 is supported for compatible 64-bit Windows guests including Windows Server 2012 and Windows Server 2012 R2, as well as supported newer releases and current Linux distributions – though some Linux distributions need the correct Secure Boot certificate template configured (Microsoft UEFI Certificate Authority vs. Microsoft Windows). Use Generation 1 when the guest, boot media, architecture, or a legacy device requirement isn’t compatible with UEFI Generation 2.
The wizard default is correct for modern Windows guests. Generation cannot be changed after VM creation – get it wrong at creation time and you’re rebuilding the VM from scratch.
Automatic Stop Action: Review the Default Per Workload
The default Automatic Stop Action for every new VM is “Save.” When the host shuts down or restarts, a Save action writes the guest’s memory to disk as a reservation file (.VMRS). The host waits for all Save operations to complete before finishing its own shutdown.
Saved-state files can require storage roughly proportional to the memory currently assigned to each VM. On a dense host, the aggregate requirement can be hundreds of gigabytes, so verify free space before maintenance rather than relying on a simple configured-memory total. On a host with limited storage, a single maintenance reboot can fail because the volume fills mid-save.
Automatic Stop Action is configured per VM, not as a documented host-wide default through Set-VMHost. Apply the selected action to existing VMs and include it in the provisioning workflow for every new VM:
# Apply to an existing VM
Set-VM -Name "VMName" -AutomaticStopAction ShutDown

# Verify across all VMs
Get-VM | Select-Object Name, AutomaticStopAction
For future VMs, include -AutomaticStopAction in the provisioning script or approved VM template rather than relying on a host-level setting, since none exists.
Review the stop action per workload rather than changing every VM to the same value. ShutDown is often appropriate when the guest can shut down cleanly and the planned restart time is acceptable. Save preserves runtime state but needs sufficient storage and can extend host shutdown – reserve it for workloads where full OS restart time is genuinely unacceptable, and make that decision consciously rather than by default. TurnOff should be reserved for workloads that explicitly tolerate abrupt power loss.
The stop action only covers half the day-one policy. Review the automatic start behavior too, since the patching workflow later in this checklist starts VMs manually in dependency order – a documented AutomaticStartAction and delay matter just as much for unattended host restarts:
Get-VM | Select-Object Name, AutomaticStartAction, AutomaticStartDelay, AutomaticStopActionSet a deliberate start order and stagger delay rather than leaving every VM to start simultaneously:
Set-VM -Name "DC01" -AutomaticStartAction StartIfRunning -AutomaticStartDelay 0
Set-VM -Name "App01" -AutomaticStartAction StartIfRunning -AutomaticStartDelay 120
There’s no universal delay value – stagger start order by real dependencies (domain controllers and infrastructure services before line-of-business VMs) and confirm the host has enough CPU and storage headroom to bring several VMs up at once.
Static vs Dynamic Memory
Dynamic Memory lets Hyper-V adjust the VM’s working set at runtime, reclaiming unused RAM and redistributing it to other VMs. In practice it works well for workloads with variable demand: file servers, dev boxes, lightly loaded web servers.
SQL Server supports Hyper-V Dynamic Memory, but don’t enable it by default without workload testing. Coordinate VM startup/minimum/maximum memory with SQL Server’s own memory limits, such as max server memory. Use static memory when deterministic allocation, vNUMA exposure, In-Memory OLTP, vendor guidance, or measured performance requires it – Dynamic Memory can affect vNUMA exposure, which matters for large NUMA-sensitive workloads.
Domain controllers can also use Dynamic Memory, provided startup memory is sufficient for boot and recovery. Static memory is a defensible operational choice when the team values deterministic capacity over density, but present it as a preference rather than a Hyper-V requirement.
Start with a documented memory policy, preserve enough host headroom, and benchmark workloads that are sensitive to NUMA or memory reclamation. Static memory is simpler; Dynamic Memory can improve density once its limits are validated for the specific workload.
5. Integration Services and Enhanced Session Mode
Integration Services in Windows Server 2025 ship as inbox drivers updated through Windows Update – not as a separate downloadable package. For Windows Server 2016 and newer guests, they’re present and update automatically with the OS patch cycle. The old ISO-based manual installs are gone for current guest OS versions. Supported Linux guests normally receive Hyper-V drivers through the kernel; keep the kernel and Hyper-V daemons such as hv_vss_daemon current through the distribution’s package process. This part is operational, not optional – verify it per VM:
Get-VMIntegrationService -VMName "VMName"Enable Guest Service Interface only when an approved management or automation workflow needs host-to-guest file copy, such as Copy-VMFile. Normal Hyper-V backup consistency uses the VSS integration service or the supported Linux backup daemon instead, not Guest Service Interface:
Enable-VMIntegrationService -VMName "VMName" -Name "Guest Service Interface"Enhanced Session Mode, by contrast, is an optional admin convenience rather than a required post-install task. It lets Hyper-V Manager console connections redirect local resources (clipboard, USB, audio) into the VM session – functionally similar to a full RDP connection. Enabling it has two parts: a host policy and a per-user preference. Enable the policy first:
Set-VMHost -EnableEnhancedSessionMode $trueThen confirm that the connecting administrator also has Enhanced Session Mode enabled under the User section of Hyper-V Settings in Hyper-V Manager – the host policy alone doesn’t guarantee that VMConnect will open an enhanced session for every user. Enhanced Session Mode is intended for supported Windows guests with Remote Desktop Services available. Server Core has no local desktop session to enhance; manage it through PowerShell Direct, WinRM, Windows Admin Center, or another approved remote-management method instead.
6. Configure Remote Management Before the Server Goes Headless
Operators get caught here when a server that was configured on the bench is now racked and headless. Remote management is a Hyper-V post-install task that has to happen before the server leaves your hands – not after.
Domain-joined hosts: configure and verify remote management through Group Policy or another approved baseline – domain membership alone doesn’t guarantee that WinRM, firewall rules, and Hyper-V Manager access are ready. See Microsoft’s remote Hyper-V host management procedure for the full setup.
Workgroup hosts: workgroup remote management is not a single TrustedHosts command. It typically requires WinRM/PowerShell remoting configuration, TrustedHosts entries on the management workstation, CredSSP client/server roles, matching local accounts or credentials, and supporting firewall rules. Follow Microsoft’s current Hyper-V workgroup-management procedure for the full steps rather than treating this as a one-line fix.
Credential Guard changes CredSSP-based Live Migration behavior on upgraded hosts. Windows Server 2025 enables Credential Guard by default on domain-joined systems that meet VBS hardware requirements. Credential Guard prevents the credential delegation pattern that CredSSP-based Live Migration relies on for single sign-on. On a host upgraded from 2019 or 2022, Live Migration and some remote management scenarios that worked before can start failing with authentication or credential errors after the upgrade. Check whether Credential Guard is active:
(Get-CimInstance -ClassName Win32_DeviceGuard -Namespace root\Microsoft\Windows\DeviceGuard).SecurityServicesRunningA return value of 1 in the array indicates Credential Guard is running. On eligible Windows Server 2025 hosts, use Kerberos constrained delegation for domain-joined Live Migration rather than disabling Credential Guard. If Live Migration fails after upgrading to WS2025, this is one of the first checks worth running.
Use Windows Admin Center when centralized browser-based host and VM management fits the environment. A gateway deployment becomes increasingly useful as the number of hosts, administrators, or remote sites grows.
For Server Core, use sconfig to verify the hostname, static IP, DNS, update source, remote management, and domain membership. Ideally these basics are completed before the Hyper-V role is installed; correct them now if they weren’t.
7. Set a Checkpoint Policy Before Anyone Takes One
Current Hyper-V versions default to Production checkpoints. They create a data-consistent state without saving VM memory, using VSS in supported Windows guests and filesystem freeze mechanisms in supported Linux guests. The catch: the Production mode can fall back to a Standard checkpoint if the production checkpoint fails, and an operator can still manually select Standard. Standard checkpoints capture VM memory state, which means the checkpoint contains in-flight transactions and open file handles. Standard checkpoints restore saved VM memory and device state rather than creating an application-consistent backup point – reverting a database, domain controller, or distributed application can roll the guest back while external systems continue forward, creating unsupported or inconsistent application state. The full breakdown of checkpoint types is in the Microsoft documentation on Hyper-V checkpoints. Confirm the effective type per VM, and for workloads where a saved-memory checkpoint is unacceptable, enforce ProductionOnly so the operation fails instead of silently falling back.
Rules to enforce before workloads start:
- Never use checkpoints as a backup substitute. Checkpoints are stored as AVHDX differential files chained to the parent VHD. If the parent is lost or corrupted, the entire checkpoint chain is unrecoverable. See What Is Hyper-V? for the full explanation.
- Never leave checkpoints running long-term on production VMs. AVHDX files grow with every write operation. A VM running on a checkpoint for 90 days on a busy server can accumulate hundreds of gigabytes before anyone checks.
- Use only supported production-consistent checkpoints for domain controllers and distributed workloads. Modern virtualized domain controllers support VM-Generation ID safeguards, but Standard checkpoints and ad-hoc reverts can still create replication and application-consistency problems. Keep verified system-state backups and follow the workload vendor’s restore procedure.
- Do not revert one node of a replicated or clustered application without a workload-aware recovery plan. Checkpointing one node can desynchronize distributed state even when Hyper-V itself permits the operation.
# Enforce Production-only checkpoints - fails rather than falling back to Standard
Set-VM -Name "VMName" -CheckpointType ProductionOnly

# Or disable entirely on VMs where no checkpoints are acceptable, per workload policy
Set-VM -Name "VMName" -CheckpointType Disabled

# Verify across all VMs
Get-VM | Select-Object Name, CheckpointType
8. Patching Strategy Is a Day-One Decision
Standalone Hyper-V hosts go down with their VMs when you patch. Patching strategy is a Hyper-V post-install decision – if a VM going offline during a monthly patch window is unacceptable, that’s a clustering requirement, and that decision needs to happen before you build production workloads on a standalone host.
For standalone hosts, the practical discipline is patching on a defined schedule with a predictable window. All VMs go down, come back up. That’s acceptable if the window is communicated and planned. Use a supported patching channel – Windows Update, WSUS, Windows Admin Center, Azure Update Manager, Configuration Manager, or another approved orchestration tool. The community PSWindowsUpdate module is a common option in smaller environments, but it’s a third-party module, not an inbox Windows Server cmdlet – review and approve it before installing.
Standalone Host Maintenance Workflow
# 1. Confirm the maintenance window and backup state
# 2. Install updates through the approved patching platform
# 3. Confirm whether a reboot is required
# 4. Reboot the host through the approved orchestration workflow
Restart-Computer
Optional example only – not a recommendation to install this on every host: the community PSWindowsUpdate module is a common step-3 substitute in smaller environments without WSUS or Azure Update Manager. Pin an approved version and repository, and confirm it passes your code-signing and supply-chain policy before using it on a production Hyper-V host.
# Third-party module - review and approve before installing
Install-Module PSWindowsUpdate -Scope AllUsers
Import-Module PSWindowsUpdate
Get-WindowsUpdate
Install-WindowsUpdate -AcceptAll -AutoReboot:$false
The reboot ends the current session – run the remaining verification steps as a separate post-reboot block, whether interactively or through your orchestration tool:
# 5. After reboot: verify Hyper-V host management
Get-Service vmms

# 6. Start VMs in dependency order
Start-VM -Name "DC01"
Start-VM -Name "FileServer01"

# 7. Verify VM startup and integration services
Get-VM | Select-Object Name, State
Get-VMIntegrationService -VMName "DC01" | Where-Object Enabled -eq $true
For clustered hosts, Cluster-Aware Updating can drain each node, live-migrate eligible clustered VMs, apply updates, and return the node to service. It can preserve workload availability when cluster capacity, networking, storage, and Live Migration are validated, but don’t present zero VM downtime as unconditional – it depends on the workload being clustered, migration success, and available capacity at patch time. See Hyper-V Failover Clustering: Quorum, CSV, and Live Migration for the full cluster setup and patching workflow.
Windows Server 2025 supports hotpatching via Azure Arc. Hotpatch reduces reboot frequency; it doesn’t eliminate reboots – planned baseline cumulative updates and some non-hotpatch updates still require a restart, so the host still needs a maintenance and recovery plan. Requirements: Azure Arc enrollment, a supported server build, and Virtualization-Based Security enabled (default on qualifying WS2025 hardware). As of May 19, 2026, Microsoft lists Hotpatch for eligible Azure Arc-enabled Windows Server 2025 Standard and Datacenter machines at no additional Hotpatch charge – Azure subscriptions and other Azure services can have separate billing, and this is a time-sensitive claim worth reverifying at the next republish. Verify current eligibility at Microsoft Learn before relying on it – the prerequisites have changed more than once.
9. Consider Hyper-V Replica Before You Need It
Hyper-V Replica asynchronously replicates VMs from a primary host to a replica host. It is not a backup. It is not a cluster. It is a DR mechanism – and the Hyper-V post-install phase is the right time to make this call, before VMs exist and before initial replication competes with production bandwidth.
Replica protects against host failure, not guest corruption. If a VM’s data is corrupted before the replication cycle runs, the corrupt data replicates too.
The configuration decision involves: authentication method, replication frequency (30 seconds, 5 minutes, or 15 minutes), recovery points (single vs. extended – extended keeps multiple hourly rollback points), and storage capacity on the replica host. Kerberos/HTTP is the appropriate choice for domain-joined hosts when encryption in transit beyond the trusted network design isn’t required; certificate/HTTPS fits workgroup, cross-domain, untrusted-domain, or encrypted-transport requirements – certificate authentication isn’t universally “the more secure default,” it’s the right choice for a specific set of scenarios. Microsoft’s Hyper-V Replica setup documentation covers the full configuration steps. For the architectural explanation of what Replica is and what it isn’t, see What Is Hyper-V?
The immediate action: decide whether this host will be a Replica source, target, or neither. First configure the Replica server role, authentication, authorization, certificate requirements, and storage path. Then enable only the inbound listener that matches the selected design on the replica target – not on every host by default:
# Enable on the replica target only when Kerberos/HTTP is selected
Enable-NetFirewallRule -DisplayName "Hyper-V Replica HTTP Listener (TCP-In)"

# Enable on the replica target only when certificate-based HTTPS is selected
Enable-NetFirewallRule -DisplayName "Hyper-V Replica HTTPS Listener (TCP-In)"
Enabling Replica later still requires an initial synchronization, but it doesn’t have to traverse the production network immediately. Hyper-V supports scheduled network replication, external-media seeding, and reuse of an existing restored VM. Select the method before large VMs are placed in service – deciding the design now, while VMs don’t exist yet, costs nothing.
10. Backups Are Not Optional, and Checkpoints Are Not Backups
Windows Server includes the optional Windows Server Backup feature, and Hyper-V provides VSS/WMI-based backup interfaces used by third-party products. This is a frequently deferred Hyper-V post-install task – and one of the more expensive ones to defer too long. Windows Server Backup can protect and recover Hyper-V VMs in smaller environments, but it lacks the centralized management, retention orchestration, immutable/offsite workflows, application-aware guest recovery, and reporting expected from a dedicated virtualization backup platform.
Before production workloads go on this host, have a concrete answer to: what backs up these VMs, where do backups go, and how long does a restore actually take? Common paths for SMB environments include Windows Server Backup for smaller deployments and dedicated virtualization backup products for centralized management and offsite/immutable retention – evaluate current options against your own requirements rather than a fixed vendor list. A dedicated article will cover Hyper-V backup strategy in this cluster.
Hyper-V Replica + checkpoints + copied VHD files is not a backup strategy. A backup is something you can restore after:
- Ransomware encryption
- Accidental deletion
- Silent data corruption
- Operator error at 11 PM
Replica replicates corruption. Checkpoints chain to a parent that can be lost. A raw copy of an active VHDX isn’t a supported backup workflow unless it’s coordinated through Hyper-V/VSS or a supported storage-snapshot mechanism – it can fail, be incomplete, or capture inconsistent guest and application state. None of these replace a backup solution with verified restores.
The two-sentence version: plan backup before VM creation, not after. A backup solution that doesn’t exist when the VM fails isn’t a backup solution.
Final Thoughts
Many host-local settings in this checklist can be applied quickly on a fresh Windows Server 2025 host. Network architecture, backup, Replica, patching, and recovery testing require separate design and validation time – the vSwitch design and patching model take the most thought; several of the rest are configuration commands easier to run now than to retrofit later.
Windows Server 2025 changes the New VM wizard to Generation 2 by default and enables Credential Guard by default on qualifying hardware. Production checkpoints were already the default in earlier supported Hyper-V releases. The settings that remain problematic in practice – Automatic Stop Action left at Save without a per-workload review, LBFO-backed Hyper-V switch creation now explicitly blocked – are exactly the type of thing that fills a disk or breaks a Live Migration at the worst possible time. The defaults exist to get you started, not to keep you running.
Set the policy before you build the workload.
FAQ: Hyper-V Post-Install Checklist
Do I need to create a virtual switch right after installing Hyper-V?
Create and validate the switch before provisioning any VM that needs network connectivity. Hyper-V can create an isolated VM without a switch, but defining the production network design first avoids disruptive rewiring later, and the External switch decision – which NIC to bind, whether to use SET teaming – is much easier to make on a host with no running VMs. Getting it wrong on a live host requires a maintenance window to fix.
Should I move default VM and VHD storage off C:?
Yes, before creating any VMs. VM configuration files default under %ProgramData%\Microsoft\Windows\Hyper-V, and virtual disks default under %Public%\Documents\Hyper-V\Virtual Hard Disks – both on the system volume. Left in place, the system volume can come under pressure faster than expected, especially for VMs left on the default Save stop action, which reserves memory-equivalent disk space on every host shutdown.
Should I use Generation 1 or Generation 2 VMs on Windows Server 2025?
Use Generation 2 when the guest OS and boot media are listed as compatible in Microsoft’s current support matrix. This includes supported 64-bit Windows Server 2012 and newer guests and current Linux distributions. Use Generation 1 for unsupported legacy operating systems, 32-bit Windows guests, or workloads that require legacy BIOS devices. In Windows Server 2025, Generation 2 is the wizard default. Generation cannot be changed after VM creation.
Are Hyper-V checkpoints a substitute for backups?
No. Checkpoints are AVHDX differential files chained to the parent VHD. If the parent is lost or corrupted, the entire chain is unrecoverable. Checkpoints also grow with every write operation and can consume the entire storage volume if left running long-term. Use a real backup solution with verified restores.
Should Hyper-V run on Server Core or Desktop Experience?
Prefer Server Core when the hardware, management tools, backup agents, and operational processes support it – smaller attack surface, lower memory footprint, faster patch cycles. Desktop Experience remains valid when local GUI requirements or vendor tooling justify the larger footprint. Windows Admin Center largely closes the management gap, making Core significantly more manageable once WAC is deployed on a gateway server.
Should I enable Hyper-V Replica right after install?
Decide whether you want it, then configure the Replica role, authentication method, and only the matching firewall listener on the replica target. Enabling Replica on existing VMs still requires an initial synchronization, but it doesn’t have to compete with production traffic immediately – scheduled replication, external-media seeding, or reusing an existing restored VM are all supported. Deciding the design on a host with no VMs costs nothing. Doing it six months later on 10 VMs totaling 4 TB is a different conversation.
What’s the difference between an External, Internal, and Private virtual switch?
External: VMs reach the physical network via a bound NIC; host optionally shares the same NIC. Internal: communication between the host and connected VMs, plus VM-to-VM communication on that switch, with no physical-network access unless the host routes or NATs it. Private: VM-to-VM only, no host access. Most production deployments use one External switch for VM traffic and an Internal switch for isolated lab networks, NAT scenarios, or management channels that don’t need direct physical-network access.
Do I still need to install Integration Services manually on Windows Server 2025?
Not for current guest OS versions. Integration Services ship as inbox drivers for Windows Server 2016 and newer, updated through Windows Update. Verify state per-VM with Get-VMIntegrationService and enable Guest Service Interface explicitly if your backup solution or tooling requires it.
Static or dynamic memory – which should I use?
Choose per workload. Dynamic Memory works well for variable or lightly loaded workloads and is supported for SQL Server and domain controllers when startup, minimum, and maximum values are validated against the application’s own limits. Use static memory when deterministic allocation, vNUMA exposure, vendor guidance, or measured performance requires it – debugging memory pressure on a running production VM during business hours is worse than slightly lower VM density on the host, but static memory isn’t a universal requirement.
Hyper-V Series
14 articles – Windows Server 2025 · Requirements · Licensing · Networking · Storage · Backup · Clustering